What Oxalic Acid Does to Wood — And What It Cannot Do
Wood finishing has gotten complicated with all the miracle-product noise flying around. As someone who has been refinishing furniture for going on eight years, I learned everything there is to know about oxalic acid wood bleach — including where it fails. Today, I will share it all with you.
But what is oxalic acid wood bleach? In essence, it’s a targeted stain remover that bonds to specific discoloration compounds and pulls them to the surface. But it’s much more than that — it’s also one of the most misunderstood products in a refinisher’s cabinet.
Here’s what it genuinely removes: iron stains, water rings, rust marks, tannin discoloration. Those dark spots from a wet glass sitting on oak for three days? Gone. The rust bloom that appears after leaving a steel wool pad on walnut overnight? Oxalic acid handles it. Tannin stains from wet leather or dark-wood-on-light-wood contact? That’s what makes oxalic acid endearing to us furniture restorers.
What it does not do matters just as much. It will not lighten the natural color of your wood. It will not remove paint, stain, or polyurethane. Dents, gouges, surface texture — untouched. It’s a stain-specific tool. Not a refinishing miracle.
The chemistry is simple enough to be useful: oxalic acid molecules bond to discoloration compounds and lift them to the surface where you wipe them away. That’s the functional knowledge. You don’t need to understand crystal lattices to get results.
Probably should have opened with this section, honestly. I applied oxalic acid during my second year expecting it to restore a tabletop’s original honey tone — the owner swore that’s how it used to look. It pulled the water stains beautifully. Then it revealed the wood underneath was actually darker than the surrounding areas. The stains had been masking sun damage the whole time. I set expectations upfront now. Don’t make my mistake.
Mixing and Application — Step by Step
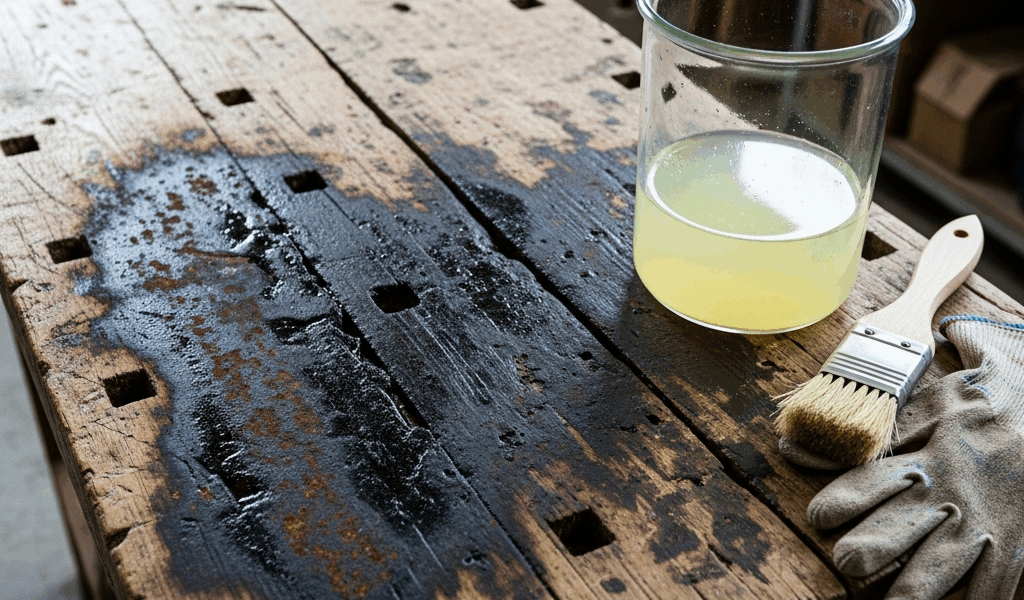
The ratio is one to two ounces of oxalic acid powder per quart of warm water. I use a basic digital kitchen scale — a $12 AmazonBasics unit that’s been sitting on my workbench for four years. Eyeballing the powder leads to inconsistent results. A 1-ounce dose handles mild water marks. A 2-ounce dose tackles rust and stubborn tannin stains.
Here’s the exact process I follow every time:
- Fill a plastic or glass container with warm water — not hot, which accelerates the reaction in ways you don’t want.
- Weigh the oxalic acid powder. Use the scale. Every time.
- Add powder slowly while stirring with a wooden or plastic rod. No metal utensils — ever.
- Stir two to three minutes until dissolved. A few stubborn granules at the bottom are normal.
- Let the solution cool slightly before applying. Gives you better control over spread and saturation.
Safety is non-negotiable here. Nitrile gloves — I buy a box of 200 from Home Depot, usually around $8. Eye protection, at minimum basic safety glasses. If you’re working overhead on a cabinet ceiling or soffit, full goggles. Ventilate the space. A shop fan or open window handles most applications. Large surface in a closed room? Use a respirator rated for organic dust. I’m apparently sensitive to airborne irritants and a 3M 8511 respirator works for me while cheaper paper masks never do anything useful.
Application itself: use a natural bristle brush. Synthetic bristles absorb too much solution and get sloppy. Dip, apply generously to the stained area — wet but not puddling. Overlap slightly onto unstained wood to feather the edges. That overlap prevents a visible demarcation line after drying. Skip it and you’ll see exactly where you stopped.
Wait twenty minutes. I’ve settled on this timing through repetition across dozens of projects. Some sources say ten minutes. Others say thirty. Twenty lets the acid work without oversaturating the grain. The solution will darken slightly as it sits — that’s the stains lifting. That’s what you want to see.
Wipe thoroughly with a damp cloth. It will be visibly dirty. Use a fresh cloth for the final pass to pull residual solution off the surface.
Specific Stain Types and How to Treat Each
Water Rings and Moisture Marks
Water rings on oak need the least aggressive approach. A 1-ounce-per-quart mix. One application removes most rings — I’ve needed a second pass maybe three times in eight years, and those involved rings that had been sitting for months. The visual difference after neutralization and drying is immediate. Water ring stains vanish in a way that genuinely still surprises me every time.
Rust Stains and Iron Marks
Frustrated by six months of water damage from a metal shelf sitting on a cherry dresser, I mixed a 2-ounce-per-quart concentration using a plastic deli container and a cheap wooden chopstick as a stirring rod — and still needed two full applications four days apart. The first pass lightened the stain significantly. The second cleared what remained.
Space applications three to five days apart. This prevents over-saturation and gives the wood time to stabilize. Rust stains embed deeper than water rings. Patience is part of the protocol here.
Dark Tannin Stains on Light Woods
This is where oxalic acid becomes genuinely indispensable. When white oak or ash absorbs tannins from dark walnut contact or wet leather, the stain can run nearly black. A 2-ounce mix is your baseline. Some stubborn tannin stains push closer to 2.5 ounces per quart — I measure this carefully, not casually.
Tannin stains also benefit from longer dwell time. Thirty minutes instead of twenty. Check at the fifteen-minute mark — if it’s noticeably lighter, you’re on track. Extended contact gives the acid time to fully engage with the tannin compounds embedded in the grain.
Mixed or Unknown Stains
When you can’t identify the source, start with a 1.5-ounce mix and test on an inconspicuous area first. Apply, wait twenty minutes, neutralize, dry completely, then assess. This test patch approach prevents aggressive over-treatment on visible surfaces. Small inconvenience up front. Much better than explaining a mistake to a client.
Neutralizing and Finishing After Bleaching
Neutralization is mandatory. Skip it and you lock oxalic acid into the wood grain — where it will continue activating with moisture indefinitely. The stain creeps back as humidity fluctuates. I’ve seen this happen. It’s not subtle.
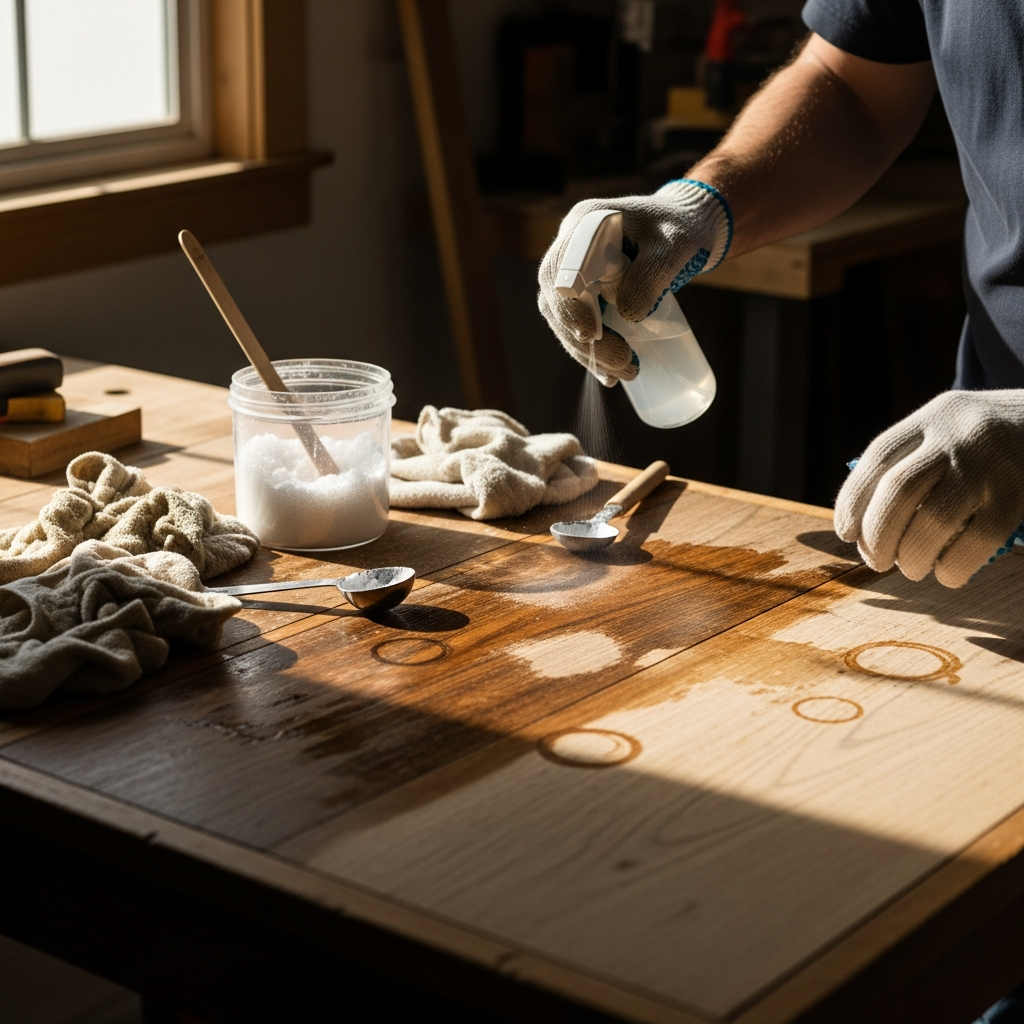
Two options work equally well in my experience: a borax solution or a baking soda slurry.
Borax method: Two tablespoons of 20 Mule Team borax powder dissolved in one quart of warm water. Apply with a brush or cloth to the bleached area. Let it dry completely — usually four to six hours, longer than you’d expect. A white powder residue will form. That’s the neutralizing reaction happening. Wipe gently with a damp cloth once dry.
Baking soda method: One tablespoon of baking soda in one cup of water. Same application process. Dries faster — two to three hours. Both work. I reach for borax on large surfaces and baking soda on small repairs where turnaround time matters.
After neutralization, wait overnight before doing anything else. Once completely dry, check the surface texture. Oxalic acid raises the grain slightly — especially on softer woods like pine. Light sanding with 220-grit smooths it out quickly. Three to five passes. You’re barely feathering the surface, not refinishing it.
Then finish as normal. Stain, seal, topcoat — whatever your plan requires. The treatment doesn’t interfere with subsequent finishes. The wood accepts stain and polyurethane exactly as it would otherwise.
One practical detail: mark your timing. I keep a dedicated kitchen timer in my workshop specifically for oxalic acid applications — a $6 mechanical one from the dollar store. It prevents the mental math of “Wait, did I start this at 2:15 or 2:30?” That math will fail you eventually.
Common Mistakes and How to Avoid Them
Skipping neutralization is the biggest error I see. People get excited about the stain removal, wipe the surface clean, and assume the job is finished. Six months later the stain is back. Neutralization feels redundant — until you experience the consequence of skipping it once.
Over-application is second on the list. Soaking wood doesn’t make the acid work faster or better. It just demands more neutralization work and extends drying time with no upside. Generous wetness is the goal. Puddles are excessive.
Metal containers or utensils can introduce iron contamination directly into your solution. Plastic, glass, and wood only. Every time.
Applying oxalic acid to finished surfaces wastes time — and your morning. It cannot penetrate polyurethane or varnish. Strip the finish first or accept that only exposed wood will respond. I clarify this before starting any job now. Probably should have learned that lesson sooner than I did.
Storage and Shelf Life
Oxalic acid powder keeps indefinitely in a sealed container stored somewhere cool and dry. I order Circa 1850 Wood Care oxalic acid online — around $15 for eight ounces — and a container lasts roughly three months with moderate furniture work. Mixed solution is a different story entirely. Use it the same day or discard it. It degrades as it sits. After twelve hours, potency drops measurably. That’s not a hedge — it’s a consistent result.
Practical Summary for Your Workshop
So, without further ado, let’s dive in — or rather, wrap up. Oxalic acid wood bleach removes discoloration that sanding cannot touch. Mix, apply, wait, neutralize, dry, sand lightly, finish. That’s the full sequence.
While you won’t need a chemistry degree or a professional restoration shop, you will need a handful of specific things: a scale, nitrile gloves, a natural bristle brush, borax or baking soda, and a timer you’ll actually use. Water rings need the mildest approach. Rust and tannin stains need stronger solutions — sometimes multiple passes. Unknown stains deserve a test patch before any full treatment.
The entire process spans two to three days when you account for drying time between steps. Slower than sanding away a finish. But it preserves the original wood surface and removes stains that sanding simply cannot address. That tradeoff is almost always worth it.


Stay in the loop
Get the latest wood working workshop updates delivered to your inbox.