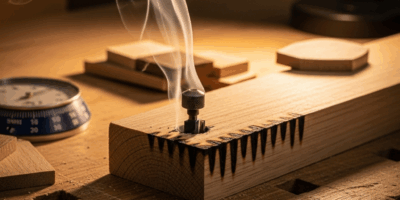
Why Burn Depth Goes Wrong in the First Place
Pyrography has gotten complicated with all the conflicting advice flying around. As someone who’s spent years hunched over a burning station making every possible mistake, I learned everything there is to know about controlling burn depth the hard way. Today, I will share it all with you.
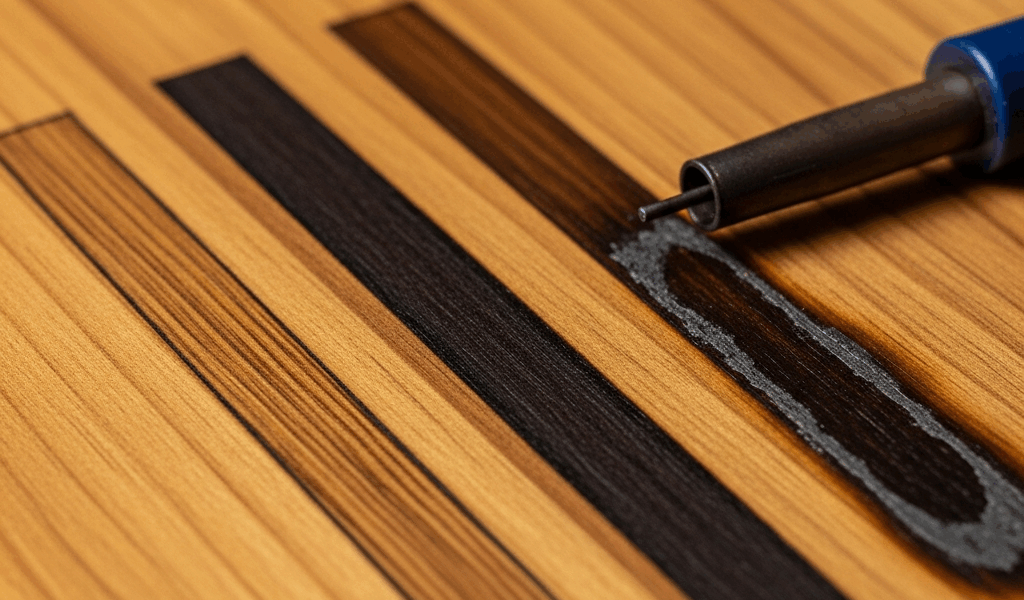
I’ve stood at my bench staring at a scrap piece of basswood — completely baffled — wondering why my tip was carving trenches when yesterday it barely kissed the surface. Turns out it isn’t mysterious at all. Three variables control burn depth: tip temperature, dwell time, and wood surface condition. That’s it. Your burner’s dial is just one input. What actually matters is tip-to-grain contact, wood moisture, and how fast your hand moves. Most people obsess over the dial and ignore the other two entirely. Before you twist that knob again, ask yourself which variable changed.
Burning Too Deep — Causes and Quick Fixes
Deep burns happen when too much heat transfers into the wood too quickly. But what is the real culprit? In essence, it’s almost always one of four things. But it’s much more than a simple temperature problem.
Temperature Set Too High for the Wood Species
This one’s easy to spot. Say you burned pine yesterday at a 7 out of 10 on your dial — worked great. Today you grabbed a walnut blank and kept the same setting. You torched it. Walnut is denser and burns faster than softwoods. Basswood forgives high heat. Hardwoods punish it.
Fix: Drop your setting by 1 to 2 notches. Make a test burn on scrap walnut at the lower setting. Wait five seconds. Light brown instead of charred black? You’ve found your window. One dial notch can mean the difference between clean detail and a crater — move incrementally, always.
Moving Too Slowly or Dwelling Too Long
Dwell time is the killer most people never think about. Working detail lines at 2 inches per second gives that tip 2–3 full seconds per inch of wood contact. That’s a long time. The tip digs in.
Fix: Push your hand speed up to 4–5 inches per second for line work. Your first pass will look light. Good — that’s intentional. You can always make a second pass. Two lighter burns look cleaner than one crater. Honestly, this adjustment alone fixes roughly 40 percent of all depth problems I see.
End Grain Vs. Face Grain
Probably should have opened with this section, honestly. End grain absorbs heat like a sponge — face grain reflects it. If your design crosses both orientations, and most do, the end grain section burns twice as deep at identical temperature and speed settings.
Fix: Slow down the moment you hit end grain. Treat it like a different wood entirely, dropping temperature relative to your face grain setting on the same piece. Test both on scrap first. A walnut end grain can go from a clean brown line to a black scar in one extra second of dwell time. Don’t make my mistake.
Tip Too Broad for the Detail
A flat 1/8-inch tip creates a wider, deeper burn than a fine point. Using a shader or broad tip for hair-thin lines makes depth look exaggerated — heat spreads across more surface area than you need.
Fix: Switch to a fine-point or tight round tip. Sets from Razertip or Colwood usually include solid options right out of the box. A 0.5 mm point tip concentrates heat into a smaller footprint — at the same temperature, you get better control and shallower overall burn depth. That’s especially true for portrait work and lettering.
Burning Too Shallow — Causes and Quick Fixes
Shallow burns are almost always a contact or heat-transfer problem. The tip isn’t doing its job. So, without further ado, let’s dive in.
Tip Not Fully Heated Before Starting
This happens constantly during busy sessions. You swap tips, press down on the wood 30 seconds later, and nothing happens. The tip never reached full operating temperature after the swap.
Fix: After changing tips or powering on, wait a minimum of 90 seconds before touching wood. Some burners need 2–3 minutes. If you’re impatient — and I always am — make test marks on scrap while you wait. When a line darkens to rich brown within 1–2 seconds of contact, the tip is ready.
Tip Is Oxidized or Dirty
A tip covered in old carbon residue loses heat transfer efficiency. Steel oxidation acts as insulation. You crank the temperature dial higher and higher, but the tip surface still can’t deliver. This is the invisible problem.
Fix: Clean your tip every 5–10 minutes of active burning. Use 0000-grade steel wool — the finest available — or a leather strop. Wipe while the tip is still warm. I’m apparently sensitive to this issue and steel wool works for me while the leather strop never quite gets everything off. One 30-second cleaning restores performance completely. I learned this while running my Razertip up to 8 out of 10, completely baffled by pale lines, only to discover the tip was caked solid with char. A quick steel wool wipe brought me right back to normal settings.
Wood Surface Has Moisture or Residue
Wet wood doesn’t burn cleanly. Surface moisture — from a humid shop, a damp wipe-down after sanding, whatever — blocks heat transfer. Dust and finish residue do the same thing.
Fix: Let sanded wood sit 2–4 hours after any moisture contact. Better yet, dry cloth only. A moisture meter runs $12–20 and removes all guesswork. Aim for 8–12 percent moisture content. Above 15 percent, burns look washed out regardless of your dial setting — no amount of temperature adjustment will save you.
Moving Too Fast
The opposite problem from before. Racing through a design at 8–10 inches per second means the tip barely marks the surface.
Fix: Pull back to 3–4 inches per second. That gives the tip enough dwell time to deposit heat properly. For complex designs, break sessions into smaller segments — fatigue causes speed creep, and speed creep ruins detail work.
How Wood Species and Moisture Change Everything
Same temperature, same tip, same speed. The wood still makes all the difference. That’s what makes pyrography endearing to us woodburners — there’s always one more variable. Basswood is the pyrography standard for a reason: predictable, forgiving, light brown at moderate heat. Other species are a different story entirely.
- Basswood: Burns light brown at medium heat. Forgiving. Best for learning. Use 6–7 on most burner dials.
- Walnut: Dense. Burns dark fast. Reduce your setting to 4–5. End grain goes deep quickly.
- Pine: Soft. Burns easily. Risk of charring at higher settings. Keep heat at 5–6 and move fast.
- Oak: Hard with open grain. Eats heat. Set to 6–7 and plan for two passes on detail lines.
- Maple: Hardwood. Tight grain. Requires 7–8 on the dial but rewards you with clean, crisp lines.
Moisture matters as much as species. Wood stored in a damp basement behaves like an entirely different material than kiln-dried stock from the same tree. Check your wood’s storage environment for the week prior to any project. A dry shop gives consistent results. A humid one creates chaos — plain and simple.
Test Burn Routine Before Every Session
This single habit prevents 90 percent of depth problems. It takes two minutes.
Before touching your actual project, grab a scrap piece of the exact same species at the same moisture condition. Burn three marks — one at your planned temperature and speed, one notch lower, one notch higher. Label them. See which depth matches what you want, then set your dial accordingly.
That’s 120 seconds of work that removes all guesswork before you commit to wood that actually matters. Professional woodburners who work on heirloom pieces do this every single session without exception. It’s not overthinking — it’s insurance. Start doing it now.


Stay in the loop
Get the latest wood working workshop updates delivered to your inbox.