Woodworking is a craft cherished by many, a form of both art and functional creation that has been practiced for centuries. Whether you are a beginner looking to start a new hobby or an experienced craftsman aiming to refine your skills, understanding the fundamental steps of woodworking is essential. This article outlines a comprehensive guide to the processes involved in woodworking, from conceptualization to the final touches of your project.
**Step 1: Planning and Design**
Every successful woodworking project starts with a solid plan. During this initial phase, you should decide on the dimensions, functionality, and aesthetics of the piece. Sketching your ideas or using software to design the project can help visualize the end product. Consider the space where the piece will reside and how it will be used. This step also involves selecting the right type of wood, considering factors such as hardness, grain patterns, and cost.
**Step 2: Measuring and Marking**
Accuracy is key in woodworking. Once you have your design, the next step involves precise measuring and marking. Use rulers, tape measures, and squares to ensure exact dimensions. Marking tools such as pencils, marking knives, or chalk are used to indicate where cuts and joints will be made. This meticulous process helps in minimizing errors during the cutting phase.
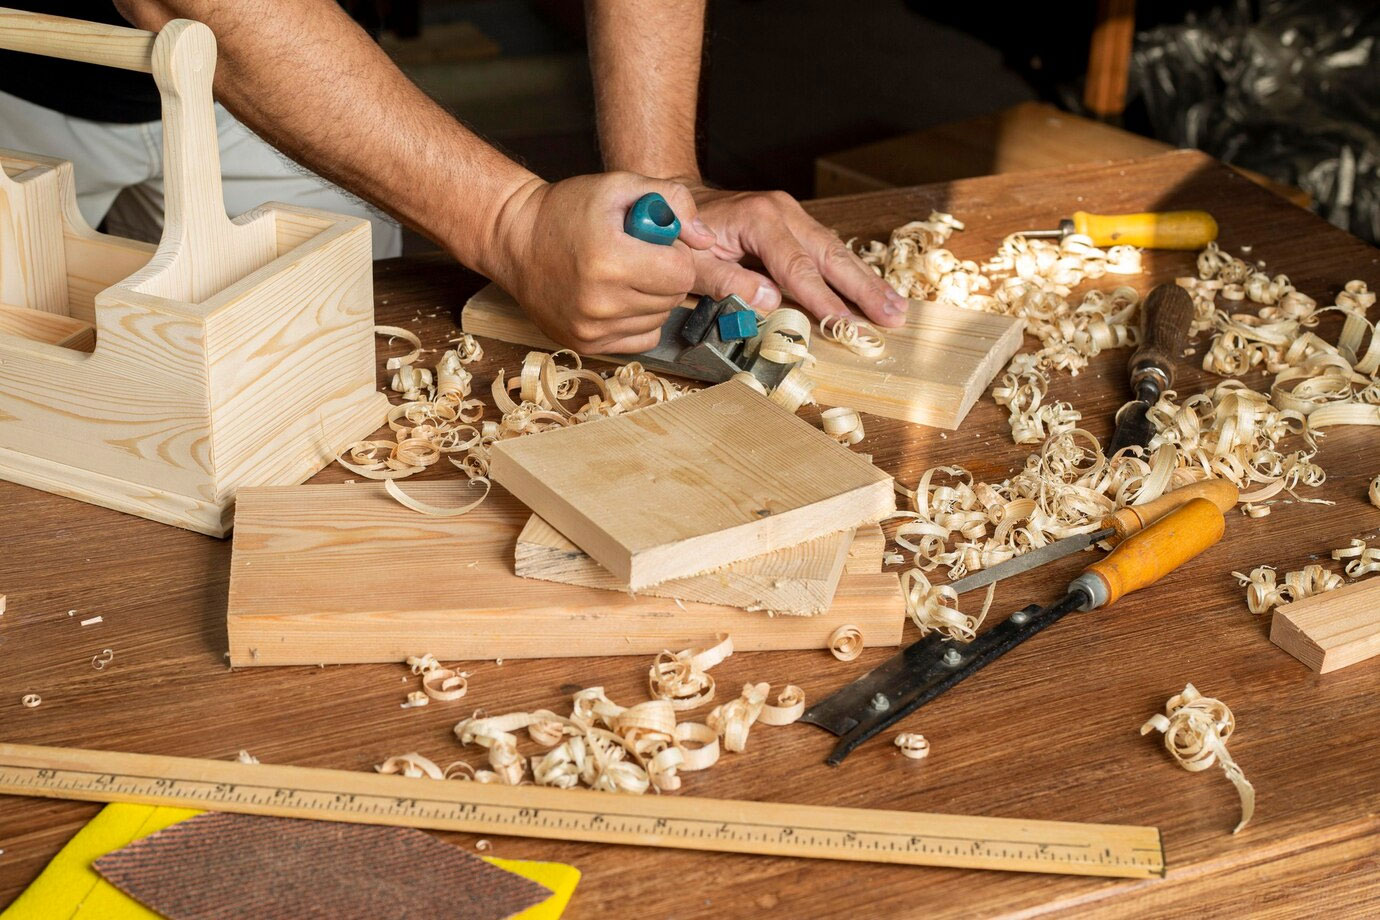
**Step 3: Cutting and Shaping**
With your wood marked, it’s time to cut it down to size. Common tools for this task include saws (hand saws, table saws, circular saws), chisels, and planes. Each tool has a specific purpose, whether it’s making straight cuts, curved cuts, or shaping the wood. Safety is paramount, so ensure you are familiar with each tool’s operation and wear appropriate safety gear.
**Step 4: Joinery**
Joining pieces of wood together is fundamental in creating any woodworking project. There are several techniques to choose from, such as dovetails, mortise-and-tenon, or simpler methods like screws and nails. The choice of joinery depends on the project’s design and the load it will bear. Gluing is also a critical part of this step, requiring clamps to hold pieces together until the adhesive sets.
**Step 5: Sanding**
Sanding is crucial for smoothing out edges and surfaces, and preparing the wood for finishing. Start with coarse sandpaper to remove any major imperfections or glue residues, then gradually move to finer grits to achieve a smooth finish. Sanding can be done manually or with electric sanders. Always sand along the grain of the wood to avoid scratches that are difficult to remove.
**Step 6: Finishing**
The final step in woodworking is applying a finish, which protects the wood and enhances its appearance. Options include stains, varnishes, oils, and waxes. Each type of finish offers different aesthetics and levels of protection. Before applying the final finish, test on a scrap piece of wood to ensure the color and compatibility are as expected. Apply the finish with brushes or cloths, following the manufacturer’s instructions for the best results.
**Step 7: Assembly and Installation**
If your project involves multiple components, the final assembly is crucial. This might include tightening fasteners, adjusting components for fit, or doing minor touch-ups with paint or finish. If the piece is a built-in or requires installation, ensure it fits properly in its designated space, and secure it safely.
**Conclusion**
Woodworking is a rewarding skill that allows you to create items that are both beautiful and functional. By following these steps, you can ensure that each project is completed with precision and care. Remember, each piece you create not only helps improve your skills but also adds a personal touch to your surroundings. Whether you are constructing a simple bookshelf or an intricate piece of furniture, the joy of woodworking is in the journey from raw material to finished product.

Leave a Reply