Understanding Basics in Woodworking for Bookcases
When embarking on a woodworking project to build a bookcase, understanding the basics is crucial. Select wood types suitable for bookcases: oak, maple, and pine are popular options. Ensure the wood is straight and free from defects.
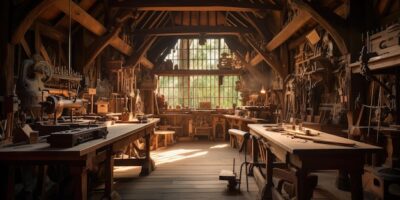
Have essential tools on hand. Use a tape measure for accuracy, a saw for cutting, clamps to hold pieces in place, a drill for making holes, and a sander for smoothing the surfaces. Safety gear like goggles and gloves is non-negotiable.
Components and Dimensions
Bookcases consist of several components: the top, bottom, sides, shelves, and back. Exact dimensions depend on the intended size of the bookcase. Standard sizes range from 72 inches tall, 30 inches wide, and 12 inches deep.
Consider adjustable shelves for flexibility. Fixed shelves offer more stability. Decide based on your needs.
Selecting the Right Wood
Solid wood offers durability and aesthetics. Plywood is an economical alternative. Opt for hardwood plywood for strength. MDF, though cheaper, is heavy and less durable.
Look for straight, flat boards. Warped wood complicates assembly and affects the longevity of the bookcase. Kiln-dried wood reduces moisture content, preventing seasonal swelling and shrinking.
Cutting and Preparing Wood
Use a table saw or circular saw for straight cuts. For curved or intricate cuts, a jigsaw works best. Always measure twice and cut once to avoid mistakes.
Sand all pieces after cutting. Begin with a coarse-grit sandpaper and progress to a finer grit. Smooth surfaces are essential for a professional finish and safe handling.
Assembling the Frame
Start with the sides and the bottom. Join these using wood glue and screws. Clamps ensure tight joints. Use a square to confirm right angles.
Add the top piece next. Ensure it’s level with the side pieces. Fixed shelves should be installed by evenly spacing them and securing them with screws and glue.
Incorporating Adjustable Shelves
Drill holes inside the sides of the bookcase to accommodate shelf pins. Space the holes evenly using a template. Shelves should fit snugly on the pins, but still be removable.
Shelves should be sturdy enough to hold the weight of books. Thicker wood or additional supports help prevent bowing.
Securing the Back Panel
A back panel adds stability. Plywood is a good choice. Attach it with finishing nails or screws. Ensure the back panel is flush with the edges of the frame.
Consider a decorative backing, like beadboard, for visual interest. This stylistic touch can elevate the design.
Sanding and Finishing
After assembly, sand the entire bookcase. Focus on ensuring all edges and surfaces are smooth. Attention to detail at this stage influences the overall quality.
Choose a finish that suits your taste and the bookcase’s environment. Stains accentuate the wood grain, paints offer a variety of colors, and clear finishes protect the wood while maintaining its natural look.
Installing the Bookcase
Position the bookcase where it will be used. Use a level to ensure it stands straight. Secure it to the wall, especially in homes with children, using L-brackets for safety.
Proper installation ensures longevity and prevents accidents. Regular checks and adjustments keep the bookcase in optimal condition.
Maintaining Your Bookcase
Avoid overloading shelves. Distribute books evenly. Clean regularly with a damp cloth. Avoid abrasive cleaners that could damage the finish.
Inspect for any loose screws or fittings regularly. Small repairs prevent long-term damage.
Applying a fresh coat of paint or finish every few years keeps it looking new and protects the wood.
Design Considerations
Bookcases are not just functional; they’re also a design element. Consider the style of your home. Matching the bookcase to existing furniture creates cohesion.
Explore various styles: traditional with ornate trim, modern with clean lines, or rustic with reclaimed wood. Customization allows for integration with your living space.
Adding decorative touches like crown molding, baseboards, or carved details can transform a simple bookcase into a statement piece.
Cost and Time Investment
Building a bookcase involves both time and money. Costs vary based on wood type, the complexity of design, and finish options. Time investment depends on your skill level.
Compared to purchasing a ready-made bookcase, DIY projects can save money. They also offer a satisfying sense of accomplishment.
Factor in the cost of tools if you’re new to woodworking. Invest in quality tools for better results and longevity.