Woodworking Projects: A Guide to Getting Started
Woodworking has gotten popular enough that there’s almost too much information available — beginner project lists, tool recommendation videos, conflicting advice from every direction. I’ve been at this for years now, and the confusion at the beginning is real. Here’s the honest guide I wish someone had given me: what tools you actually need to start, which projects build real skills, and how to progress without wasting money on things you don’t need yet.
Essential Tools
The temptation is to buy everything before you build anything. Resist it. Here’s what you genuinely need to start:
- Measuring Tools: A quality tape measure, combination square, and marking gauge. Accurate layout is where good woodworking starts — cheap squares lie.
- Saws: A circular saw gets you started on rough cuts. A decent hand saw handles the rest. A jigsaw adds curve-cutting capability. You don’t need a table saw to begin.
- Chisels: Sharp chisels are non-negotiable for detail work and joinery. Buy a small set of quality chisels and learn to sharpen them before anything else.
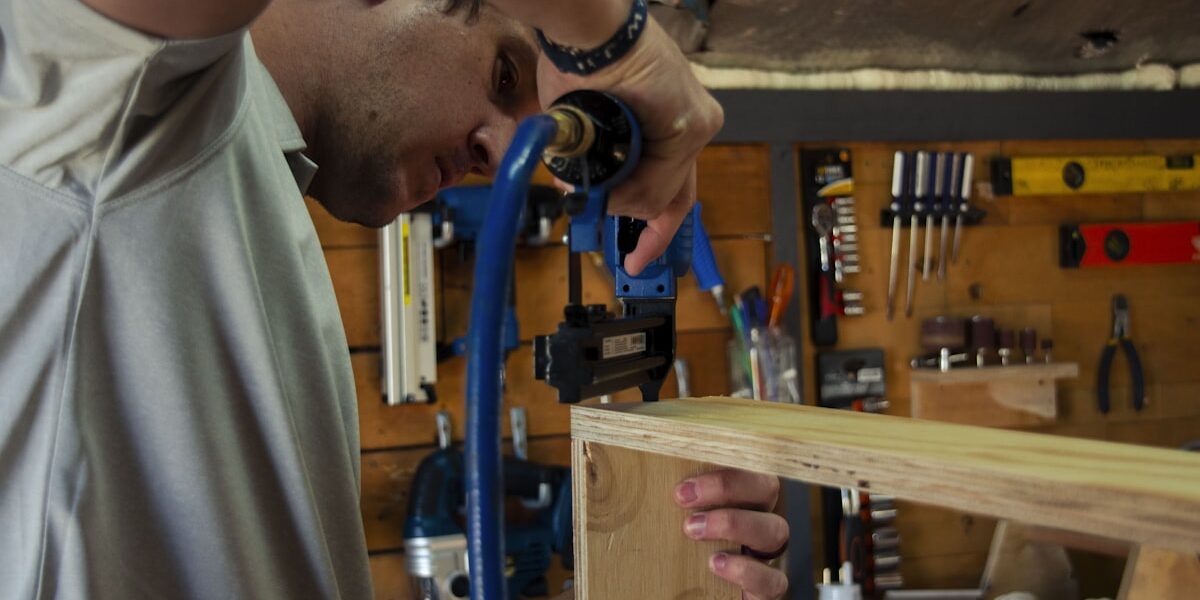
- Drill: A power drill with a basic bit set covers more situations than you’d expect. A battery-powered cordless model is more useful than a corded drill for most shop situations.
- Sanders: A random orbital sander handles most of what you’ll need. Keep a sanding block around for flat surfaces and detail work.
- Clamps: You’ll always need more clamps than you think. Start with a half-dozen bar or pipe clamps in the 24-36″ range and a few spring clamps.
- Workbench: A sturdy surface to work on — either build one early or use a heavy table. The workbench is the foundation of the shop.
Understanding Woods
Wood species selection trips up beginners more than it should. Here’s the practical breakdown:
- Hardwoods: Oak, maple, and walnut are durable, beautiful, and worth the investment for furniture that will last. They machine well but require sharper tools than softwoods.
- Softwoods: Pine, cedar, and fir are forgiving on tools, widely available, and significantly cheaper. Pine is an excellent starting material — it shows mistakes clearly, which is how you learn. Wish I’d done more pine projects early instead of jumping to expensive hardwood too soon.
- Plywood: Made of cross-laminated veneers, plywood is stable, strong, and versatile for casework, shelving, and shop furniture. Learn to work with it early — you’ll use it constantly.
- MDF: Smooth, stable, and takes paint exceptionally well. Limited structural strength and doesn’t tolerate moisture, but excellent for painted projects and shop jigs.
Basic Projects for Beginners
Start with projects that teach fundamental skills without requiring expensive materials or complex joinery. Confidence comes from finishing things, not from ambitious failures.
Birdhouse
A birdhouse is genuinely the right first project — not just a cliche. You practice measuring, marking, cutting, and assembly in a low-stakes object that has a clear finish line. Screw up the dimensions slightly and it’s still a birdhouse. The techniques transfer directly to more serious work.
Bookshelf

A simple fixed-shelf bookshelf introduces dadoes, rabbets, and square assembly — all foundational techniques. Keep the design straightforward: four sides, fixed shelves, a back panel. That’s it. You’ll learn more from building this well than from attempting something ornate and finishing it poorly.
Picture Frame
Picture frames require precise miter cuts and accurate corner joints — exactly the skills that separate work that looks professional from work that looks homemade. The material cost is low enough that you can cut and recut until the miters close perfectly. Practice these until they’re right.
Intermediate Projects
Once you’ve built basic projects and they look like you meant them to look, step up to work that introduces more complex joinery and larger assemblies.
Adirondack Chair

An Adirondack chair introduces angled cuts, structural assembly, and exterior finishing in a project that gets real outdoor use. It also forces you to think about how a structure carries load — seats, back angle, and leg geometry all interact. Build it from cedar or white oak for durability.
Coffee Table
A coffee table is where furniture joinery starts to matter. Mortise-and-tenon, biscuit, or dowel joints for the leg-to-apron connection; a carefully flattened top. This project rewards patience and punishes rushing. Build it slowly, check for square at every step, and it’ll look like real furniture when you’re done.
Cabinets
Cabinet building blends precision carpentry with fine joinery. Doors, drawers, face frames, hardware installation — each element introduces new skills. A simple shop cabinet is the right first cabinet project: utility work where mistakes don’t end up in your living room. I’m apparently someone who built three shop cabinets before I was confident enough to build kitchen cabinets. That progression was worth it.
Advanced Projects
Advanced projects separate woodworkers from cabinetmakers and furniture makers. They require sustained precision over long timelines and leave no room for shortcuts.
Wardrobe
A wardrobe combines multiple systems: a case, shelves, a hanging section, doors, and drawer banks. Precision in every measurement is essential because errors compound across a large structure. This project hones advanced joinery, installation fitting, and finishing skills that transfer to virtually any furniture project.
Dining Table
A dining table is the centerpiece project for most serious woodworkers. Getting the top flat, the legs level, and the proportions right requires mastery of several skills at once. A dining table built with proper joinery and finished carefully will outlast its builder — that’s the standard to work toward.
Grandfather Clock
Building a grandfather clock is the kind of project that takes most of a year and rewards every minute of the investment. The case work is complex cabinetry; the decorative details require precision routing and carving; integrating the clock movement requires mechanical precision. The result is an heirloom. Took a friend of mine 14 months to build one. He calls it the best thing in his house.
Finishing Techniques
Good finishing transforms decent work into great work. Get this right.
- Sanding: Work through the grits — start coarse enough to remove machine marks and defects, work up to 180 or 220 for the final surface. Sand with the grain. Never skip grits; each grit removes the scratches left by the one before it.
- Staining: Adds color while preserving the wood’s grain character. Apply with a brush or rag, let it penetrate for the recommended time, then wipe off the excess. Pre-condition softwoods like pine to prevent blotching.
- Sealing: Polyurethane, shellac, or varnish protects the surface and gives the finish its durability. Apply thin coats, sand lightly between coats, and let each coat cure fully before the next.
Safety Tips
Woodworking tools don’t care about your attention level. A few practices that matter every time:
- Wear safety glasses whenever a tool is running. No exceptions — chips and splinters travel fast and eyes don’t heal the way skin does.
- Hearing protection for power tools, especially a router or table saw running for extended sessions. Cumulative hearing damage sneaks up on you.
- Clean workspace. Chips and offcuts on the floor are trip hazards; sawdust accumulation is a fire hazard near anything electrical.
- Read the manual for every tool before you use it. I know. But the time you skip it is the time you learn why the manual exists.
- Ventilation when finishing. Most finishes off-gas significantly. Open the shop, run a fan, wear an organic vapor respirator for solvent-based products.
Resources for Learning
- Books: The Complete Manual of Woodworking by Jackson, Day, and Jennings is the classic comprehensive reference. Understanding Wood by R. Bruce Hoadley covers material science in a way that genuinely changes how you select and work wood.
- Online Tutorials: YouTube has excellent woodworkers sharing real techniques — Paul Sellers for hand tools, Rex Krueger for accessible skill development, and dozens of furniture makers sharing project builds. Watch how real projects get built, not just highlight reels.
- Workshops: Local community woodworking shops and craft schools offer hands-on learning that videos can’t replace. Getting feedback on your technique from someone who can see you work is worth the class fee.
- Forums: The Woodworking Network, Sawmill Creek, and similar communities offer real experience from people who build things for a living. Use them when you’re stuck.
Maintenance and Care
- Sharpen your tools regularly. Sharp tools work better and are safer than dull ones — dull tools require more force, which means more loss of control.
- Store lumber stickered and supported to prevent warping. Newly milled or acclimating wood moves more than you expect.
- Inspect finished work periodically and catch finish wear or joint loosening early. A small repair done promptly prevents a big repair later.
Woodworking rewards patience, precision, and the willingness to start over when something isn’t right. The skills compound — each project teaches you something that makes the next one easier. Start simple, build things that teach you something, and don’t skip the fundamentals.


Stay in the loop
Get the latest wood working workshop updates delivered to your inbox.