
Build Your Own CNC Router
Building a CNC router has gotten more achievable with all the affordable components and community documentation available now. As someone who built one from scratch a few years back — and spent several frustrating weekends figuring out what the guides didn’t tell me — I learned what actually matters in this project. Today, I will share it all with you.
Materials
Before anything else, gather the components. Here’s the full list of what you’ll need:
- Base Frame: Aluminum extrusions or steel tubing
- Rails: Linear guide rails or rods
- Screws: Lead screws or ball screws
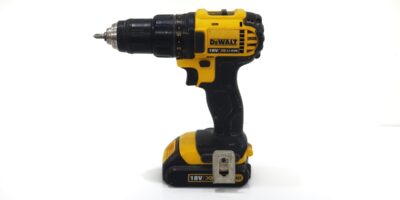
- Motors: Stepper motors
- Motor Drivers: Compatible with your motors
- Controller: CNC controller (Arduino with GRBL is popular)
- Power Supply: Suitable for your electronics
- Spindle: Router or dedicated CNC spindle
- Miscellaneous: Bearings, couplers, brackets, wiring, and connectors
Design and Planning
Start with a clear plan before you buy anything. Sketch the machine and decide on working dimensions based on the size of material you’ll actually cut. A machine that’s larger than you need is harder to build rigid, harder to calibrate, and costs more. Size it to your real use case.
Frame

The frame is the foundation that everything else depends on. Aluminum extrusions are the most popular choice for first builds — they’re easy to work with, modular, and adjustable without welding. Steel tubing provides more rigidity if you have welding capability and need a more robust machine for harder materials. Whatever you choose, the frame must be perfectly level and square before the rails go on. Any racking in the frame becomes error in every cut.
Rails and Screws

Linear guide rails provide better precision and smoother motion than round rod options, but cost more. Round rods are a reasonable budget choice if you’re careful about deflection — they flex more under load, which limits cutting depth and feed rate for accurate work. Lead screws are simpler and more affordable than ball screws; ball screws provide higher precision and less backlash, which matters if you’re doing detailed engraving or cutting tight tolerances. For a first build doing basic wood routing, lead screws are fine.
Assembly
Start with the base frame. Cut extrusions or tubes to length, assemble the base, and use a carpenter’s square to confirm everything is square before tightening. Any twist or racking at this stage carries through the entire build.
Attach the linear rails to the frame using precision tools to confirm alignment. Misaligned rails produce binding and inaccurate motion — take the time to get this right. Mount the lead screws or ball screws parallel to the rails.
Mount the stepper motors using appropriate mounts for your frame. Connect motors to screws with flexible couplers — the flexibility absorbs minor misalignment without binding. Install bearings and brackets on all movable carriage parts. Attach the carriage plates to the rail bearings — these will carry the spindle through all three axes.
Electronics
Wire the stepper motors to the motor drivers following the wiring diagram for your specific components — this part doesn’t tolerate improvisation. Connect the drivers to the CNC controller. An Arduino with a GRBL shield is the most widely documented setup for hobby builds, with extensive community support for troubleshooting. Other commercial controllers exist and work well too.
Set up the power supply to match the voltage and amperage requirements of your drivers and motors. Undersized power causes random stalls and lost steps; oversized power can damage electronics. Get the sizing right upfront.
Connect the controller to a computer, load GRBL firmware, and test each axis independently by jogging through the software. Confirm smooth motion and the correct direction of travel before proceeding. Took me three ruined pieces to always do this step before running any real toolpaths.
The Spindle
A standard router is the most accessible spindle choice — widely available, known performance characteristics, and easy to mount. Dedicated CNC spindles offer variable speed control and typically better runout specification, which matters for fine work. Mount the spindle square to the bed in both axes — a tilted spindle produces surfaces that aren’t flat and walls that aren’t vertical.
Connect the spindle to a speed controller if using a VFD spindle, or a switched outlet if using a router. Ensure the power circuit is properly rated.
Software and Calibration
Choose CNC software that supports your controller. Mach3, LinuxCNC, and Easel are common choices covering the range from free to commercial. These translate designs from CAD software into G-code — the motion commands the controller executes. The workflow is: design in CAD, generate toolpaths in CAM software, send G-code to the controller.
Calibrate the machine by measuring actual travel versus commanded travel on each axis. Adjust the steps-per-unit settings in the firmware until commanded distances match measured distances accurately. Use a dial indicator or known-dimension test cuts to verify. My shop buddy spent an entire Saturday on calibration on his first build — it paid off immediately in cut quality.
Run a dry run with the spindle off before cutting anything. Watch for unexpected movement, binding, or vibration. This catches mechanical problems before they show up in ruined material.
Making Your First Cuts
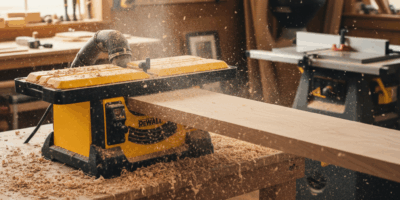
Clamp your material securely to the spoilboard — workpiece movement during a cut ruins the part and can damage the machine or spindle. Connect dust collection before running; CNC routers generate significant chip volume. Load a simple design — a basic profile cut or engrave — for the first test.
Zero the machine at the origin point specified in your toolpath. Run the program at a reduced feed rate on the first pass. Watch for any unusual sounds, vibration, or steppers missing steps. Building confidence in the machine before pushing it is time well spent.
Maintenance and Upgrades
Clean and lubricate the rails regularly — chips and dust work into the bearings and accelerate wear. Check for loose screws and hardware after every session; vibration works things loose constantly. Inspect lead screws for debris and lubricate the nuts.
Upgrades worth considering over time: end stops for repeatable automatic homing, ball screws if precision is limiting your work, a better spindle if runout or speed range is an issue. The machine you build is a starting point, not a finished product — expect to improve it as you understand its limitations better through actual use.
Building your own CNC router is a genuine project with real rewards. The machine you end up with is one you understand completely, which makes troubleshooting and future improvements much easier than working from a black box. Take your time on the frame and calibration, and the cutting capability follows.


Stay in the loop
Get the latest wood working workshop updates delivered to your inbox.