When I started woodworking, joinery intimidated me. All those Japanese names, precision measurements, and horror stories about pieces not fitting. I almost stuck to pocket screws forever.
But here’s what I learned after some frustrating early projects: joinery isn’t magic. It’s just practice and understanding why each joint works. Once I stopped treating dovetails as some impossible black art and started just cutting practice joints, the skill came faster than I expected. This guide breaks down every common joint type in plain language, with honest assessments of difficulty and when each makes sense.
What Makes a Good Joint?
Before diving into specific joints, let’s talk about what we’re trying to achieve.
Strength
The joint needs to hold the piece together under the stresses it will face. A bookshelf joint needs to support weight. A chair joint needs to handle movement and shock. Match the joint to the application.
Glue Surface
More wood-to-wood contact means more glue surface means stronger bonds. Joints that interlock provide more glue surface than butt joints. Long grain to long grain glues better than end grain.
Mechanical Advantage
The best joints work even without glue because the wood itself locks together. Glue then makes them permanent. Dovetails are the classic example – they literally can’t pull apart.
Appearance
Some joints are meant to be seen. Others hide inside the work. Choose based on whether the joint will be visible and what aesthetic you want.
Butt Joints: The Starting Point
The simplest possible joint – one piece of wood against another, held with glue, screws, or nails. Not sophisticated, but don’t dismiss it.
When to Use
Quick projects, shop furniture, situations where appearance doesn’t matter, and anytime structural loads are light. My workshop has plenty of butt-jointed shelves that have served fine for years.
How to Make It Strong
The joint itself is weak because you’re gluing end grain to face grain. So reinforce it. Corner blocks add tremendous strength. Pocket screws work well. Dowels or biscuits help alignment and add glue surface.
For a glued butt joint to be even moderately strong, both surfaces must be perfectly flat and square. Any gap is a weak point.
Difficulty: Very Easy
Cut your pieces square. That’s really the only skill required.
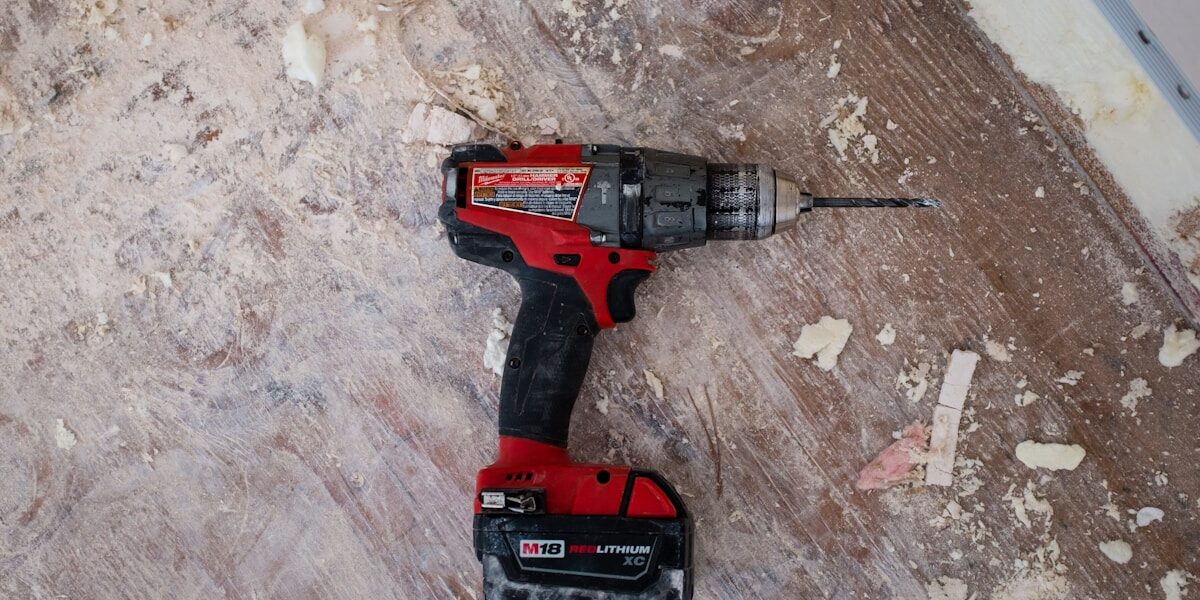
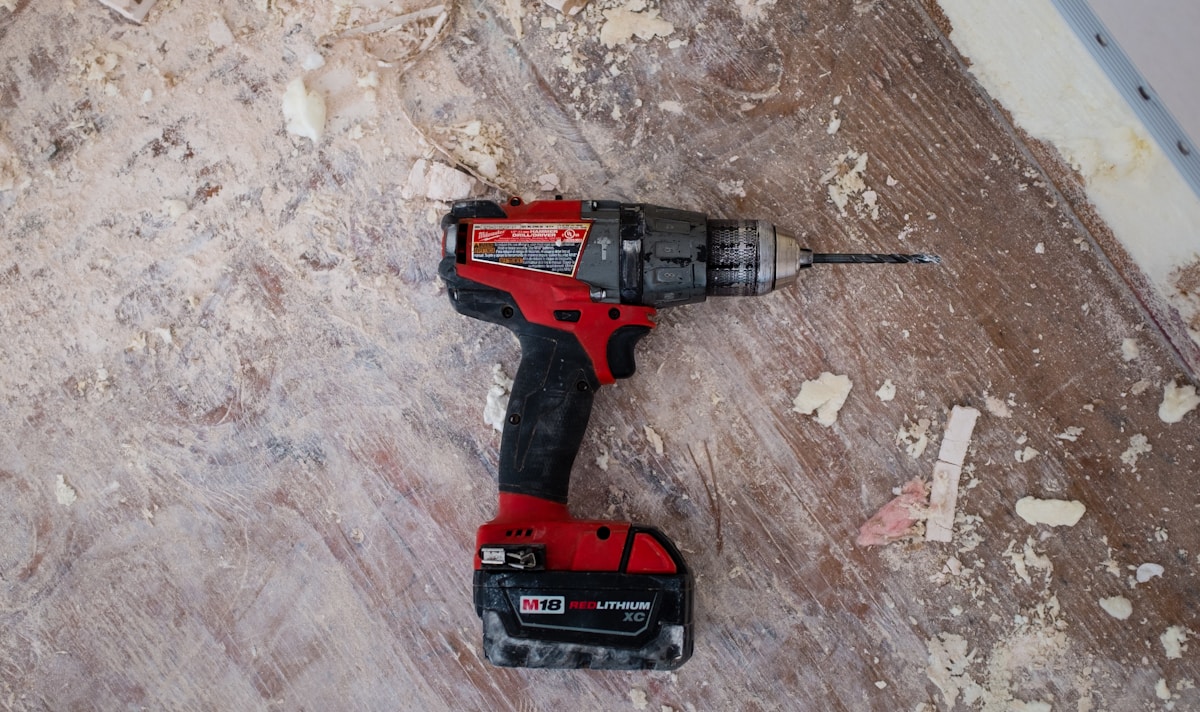
Pocket Hole Joinery
The modern shortcut that traditionalists love to hate. An angled hole drilled through one piece, with a screw that pulls the joint tight. Fast, strong, and surprisingly versatile.
When to Use
Face frames, plywood construction, quick projects, hidden joints. I use pocket holes for the structure of most furniture, then add decorative joinery where it shows.
Pros and Cons
Pros: Fast, no clamps needed, adjustable before final tightening, strong in the right applications.
Cons: The holes are visible from one side (plan accordingly), doesn’t work well for very thin stock, purists will give you grief.
Tips for Success
Always use the correct screw length for your material thickness. The jig should have settings marked. Using a screw too long will punch through; too short won’t grip properly.
Glue helps. Pocket screws alone are strong, but adding glue makes the joint even better and more permanent.
Difficulty: Easy
Buy a quality jig (Kreg is the standard), watch a quick tutorial, and you’re building furniture the same day.
Dowel Joints
Cylindrical pegs that bridge two pieces of wood, adding mechanical interlock and glue surface. An old technique that remains relevant.
When to Use
Edge-to-edge glue-ups (like tabletops), frame joints, reinforcing other joints, anywhere you need invisible reinforcement.
The Challenge
Alignment. If your holes don’t line up perfectly, the joint won’t come together or will be twisted. This requires careful layout or specialized jigs.
Dowel centers make alignment easier – metal points that mark matching hole locations. Or use a self-centering dowel jig that ensures holes are placed identically in both pieces.
Tips for Success
Use fluted or spiral grooves dowels, not smooth ones. The grooves let glue escape and air evacuate as you assemble. A smooth dowel can create a hydraulic lock that prevents full seating.
Don’t add glue to the holes – add it to the dowels. Spreading glue around a hole is messy and you’ll use too much.
Drill slightly deeper than half the dowel length. This allows room for excess glue and ensures the dowel doesn’t bottom out before the joint closes.
Difficulty: Moderate
The concept is simple but execution requires precision. Practice alignment on scrap before committing to your project pieces.
Biscuit Joints
Football-shaped wafers of compressed wood that fit into matching slots. When glue hits them, they swell for a tight fit. Great for alignment, debatable for strength.
When to Use
Edge-to-edge glue-ups (aligning boards for a tabletop), panel assembly, miter reinforcement, any joint where alignment matters more than mechanical strength.
The Debate
Are biscuits structural or just for alignment? Tests show they add minimal strength to an edge joint – the glue does all the work. But they’re fantastic for keeping boards flush during glue-up, which is valuable.
The Tool
Biscuit joints require a plate joiner (biscuit joiner). It’s a specialized tool with one purpose. Worth it if you do a lot of panel glue-ups, overkill if you’re building occasionally.
Tips for Success
Don’t overdo the layout – biscuits every 8-12 inches is plenty. More doesn’t add strength.
Swap in the largest biscuit that fits your stock thickness. #20 biscuits are standard but #10s work better for thinner material.
Dry fit always. The slots should align perfectly before you add glue.
Difficulty: Easy
If you have the tool, it’s quick to learn. The plate joiner does most of the work.
Mortise and Tenon
The king of traditional joinery. A rectangular projection (tenon) fits into a matching hole (mortise). Used everywhere from chairs to doors to timber framing.
Why It’s So Strong
Maximum glue surface. The cheeks of the tenon provide long-grain-to-long-grain contact. The shoulders of the joint prevent racking. It’s mechanically solid even before glue.
Types
Through mortise and tenon: The tenon goes completely through and is visible (sometimes wedged for decoration). Very strong.
Blind mortise and tenon: The tenon stops inside the mortise, invisible from outside. Most common for furniture.
Haunched tenon: A stepped tenon that fills a groove, commonly used for frame-and-panel construction.
Loose tenon: Both pieces get mortises, connected by a separate tenon piece. Easier to make with machines, equally strong.
How to Make Them
The tenon: Table saw, bandsaw, or handsaw – cut the cheeks and shoulders. The tenon should be one-third the thickness of the stock, roughly.
The mortise: Drill out most of the waste, then square the corners with a chisel. Or use a dedicated mortising machine/attachment. Or a router with a fence.
The tenon fits the mortise, not the other way around. Cut the mortise first, then sneak up on the tenon fit by removing small amounts until it’s snug.
The Fit
You want a friction fit – it should slide together with hand pressure but not be loose. Too tight and you won’t get it together with glue in there. Too loose and it’s weak.
Tips for Success
Mark your mortises from the actual tenons, not from measurements. Layout directly from the parts accounts for any small variations.
Leave the tenon slightly long, then trim to final length for a perfect flush fit after assembly.
Don’t forget to dry fit! A mortise and tenon that won’t go together with glue is a disaster.
Difficulty: Moderate to Challenging
The concept is straightforward. Achieving the precise fit required takes practice. Start with larger joints where small errors are more forgiving.
Box Joints (Finger Joints)
Interlocking rectangular fingers, like meshing combs. Strong, decorative, and a natural for boxes and drawers.
Why They Work
Massive glue surface – all those fingers mean a lot of long-grain contact. The interlocking provides mechanical strength. When done well, they’re strong and eye-catching.
How to Make Them
Most people use a jig at the table saw. The dado blade cuts the notches, and the jig indexes each cut off the previous one. Once set up, you can cut joints quickly and precisely.
They can also be cut with a router table using a straight bit and similar indexing jig.
Layout Matters
The fingers should look balanced. Typically you want a full finger at each corner edge, not a notch. Work out your finger width so it divides evenly into your board width.
Tips for Success
Take time with jig setup. Test on scrap until the fit is perfect. Too tight and the joint won’t close; too loose and you’ll have gaps.
Glue all surfaces. Apply glue to every finger and notch. It’s fussy but worth it.
Clamp in both directions – pulling the fingers together and holding the box square.
Difficulty: Moderate
Jig setup is the challenging part. Once dialed in, the cutting itself is straightforward.
Dovetails
The joint everyone recognizes. Angled tails on one piece fit into matching pins on another. Beautiful, strong, and undeniably impressive.
Why They’re Special
Dovetails cannot pull apart. The angled geometry locks the joint mechanically. Combined with generous glue surface, they’re incredibly strong.
And they just look good. Visible dovetails say “this was made with care” like few other features.
Types
Through dovetails: Visible from both sides. Traditional and decorative.
Half-blind dovetails: Visible only from one side, hidden from the front. Standard for drawer fronts.
Secret mitered dovetails: Hidden by mitered corners. Maximum showing off.
Hand vs. Machine
Hand-cut dovetails are a meditative exercise in precision. They allow infinite flexibility in spacing and angles. Many woodworkers find cutting them relaxing.
Dovetail jigs with routers produce perfect dovetails quickly. The spacing is predetermined but the results are strong and consistent. No shame in using a jig.
How to Hand Cut
There are entire books on this subject, but briefly:
1. Mark the baseline (depth of the tails) on all pieces.
2. Lay out the tails on the tail board. Traditional angles are about 1:8 for hardwood, 1:6 for softwood.
3. Cut the tails with a dovetail saw, staying just outside your lines.
4. Remove the waste between tails with a coping saw and chisel to the baseline.
5. Use the completed tails to mark the pins on the pin board.
6. Cut and chisel the pins.
7. Test fit and make any adjustments needed.
Tips for Success
Sharp tools are essential. A dull chisel makes clean cuts impossible.
Cut to the waste side of your lines. You can always remove more material, you can’t add it back.
Tight is better than loose. A too-tight dovetail can be persuaded together. A loose one will always have gaps.
Accept that your first attempts will be imperfect. Everyone’s first dovetails are rough. Keep practicing.
Difficulty: Challenging
Hand-cut dovetails are a skill that takes practice to develop. Router jig dovetails are more accessible but still require careful setup.
Miter Joints
Two pieces cut at 45 degrees meeting to form a corner. Clean and elegant, but weaker than they look.
The Problem
A miter joint is essentially an end-grain-to-end-grain glue joint, which is weak. The appearance is great but the structure needs help.
Reinforcement Options
Splines: A thin strip of wood glued into matching grooves across the miter. Adds glue surface and mechanical strength.
Biscuits: Hidden inside the miter, they align the joint and add some strength.
Pocket screws: On the back where they won’t show.
Keys: Decorative splines added after assembly, visible on the outside corner.
Cutting Accurate Miters
Your miter saw or table saw needs to be dead-on 45 degrees. Check it with a reliable square. Even half a degree off means gaps in your joint.
Cut matching pieces at the same time if possible – any error will at least be consistent.
Tips for Success
Miter clamps or picture frame clamps make assembly much easier than trying to hold angled pieces with regular clamps.
Blue tape can pull a miter together during glue-up. Lay pieces flat, apply tape across the joint like a hinge, then fold it closed.
Difficulty: Moderate
Cutting a miter is easy. Cutting a perfect miter that closes without gaps is harder. Clamping and assembly is awkward without specialized clamps.
Rabbet Joints
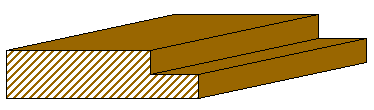
An L-shaped step cut into one piece, creating a ledge for another piece to rest on. Simple but useful.
When to Use
Cabinet backs, drawer bottoms, box construction, anywhere you want to partially hide one piece behind another.
How to Make
Table saw with two passes (one flat, one on edge). Router with a rabbet bit. Dado stack. Hand plane. Lots of options.
The rabbet should typically be half to two-thirds the thickness of the material receiving the joint.
Tips for Success
A rabbet joint looks best when perfectly sized for the material it holds. Measure your plywood or other panel material – it’s rarely exactly the stated thickness.
Difficulty: Easy
One of the simpler joints to execute. Good beginner project.
Dado Joints
A channel cut across the grain (dado) or with the grain (groove). Shelves slot in, creating clean alignment and decent strength.
When to Use
Bookshelves, cabinet boxes, drawer dividers, any time you want something to slot into a housing.
Through vs. Stopped
A through dado goes all the way across the board and is visible from the front edge. A stopped dado stops before the edge, hiding the joint.
How to Make
Dado stack on the table saw is fastest. Router with a straight bit and straightedge works well. Multiple passes with a regular blade is possible but tedious.
Size the dado to the actual thickness of the material that will fit in it. Test fit with scraps first.
Tips for Success
For plywood shelves, use a test piece of the actual plywood to set your dado width. Sheet goods are rarely exactly their stated thickness.
Difficulty: Easy to Moderate
Straight dadoes are simple. Stopped dadoes require cleaning out the rounded router corners with a chisel.
Bridle Joints
Like a mortise and tenon, but open on one or more sides. Common in frame construction.
When to Use
Corner joints in frames, leg-to-apron joints, anywhere you want the strength of a mortise and tenon with easier cutting.
Pros and Cons
Easier to cut than a closed mortise – you can use the table saw for the whole thing. But the open design means less glue surface and different aesthetics.
Difficulty: Moderate
Easier than mortise and tenon, but still requires precision for a good fit.
Choosing the Right Joint
With all these options, how do you decide? Consider:
Stress the joint will face: Match joint strength to application.
Visibility: Will it be seen? If so, make it decorative or choose a hidden option.
Your skill level: Be honest. A simple joint done well beats a complex joint done poorly.
Time available: Hand-cut dovetails take hours. Pocket screws take minutes.
Tools you have: Some joints require specialized tools or jigs.
My Recommendations for Beginners
Start with pocket screws for carcass construction. They work, they’re fast, and you can build real furniture while developing other skills.
Add dowel joints for projects where you need invisible reinforcement.
Learn mortise and tenon when you’re ready for chairs and tables that will last generations.
Work toward dovetails as a long-term skill development goal. They’re not necessary for most projects, but the ability to cut them is deeply satisfying.
Most importantly, don’t let joinery scare you away from building things. Even imperfect joints can make perfectly functional furniture. Start building, and your joints will improve with practice.

Stay in the loop
Get the latest wood working workshop updates delivered to your inbox.