As someone who reorganized my shop around a French cleat wall and hasn’t looked back in five years, I can tell you the system earns its reputation. Today I’ll share what I know about building one and making it work.
What a French Cleat Actually Is
A French cleat is two interlocking pieces — one mounted to the wall, one attached to whatever you’re hanging — both cut to the same 45-degree bevel. The wall piece goes up with the bevel facing upward. The hanging piece attaches to your tool holder, cabinet, or shelf with the bevel facing down. When you drop one onto the other, the physics of the angled connection locks them together under load. The heavier the item, the tighter the connection holds.

Hardwood cleats are standard for DIY shop applications — 3/4″ plywood ripped at 45 degrees on the table saw is the typical approach. Metal cleats exist for heavier industrial loads. For most workshop uses, 3/4″ plywood handles the weight without complication.
Where French Cleats Work Well
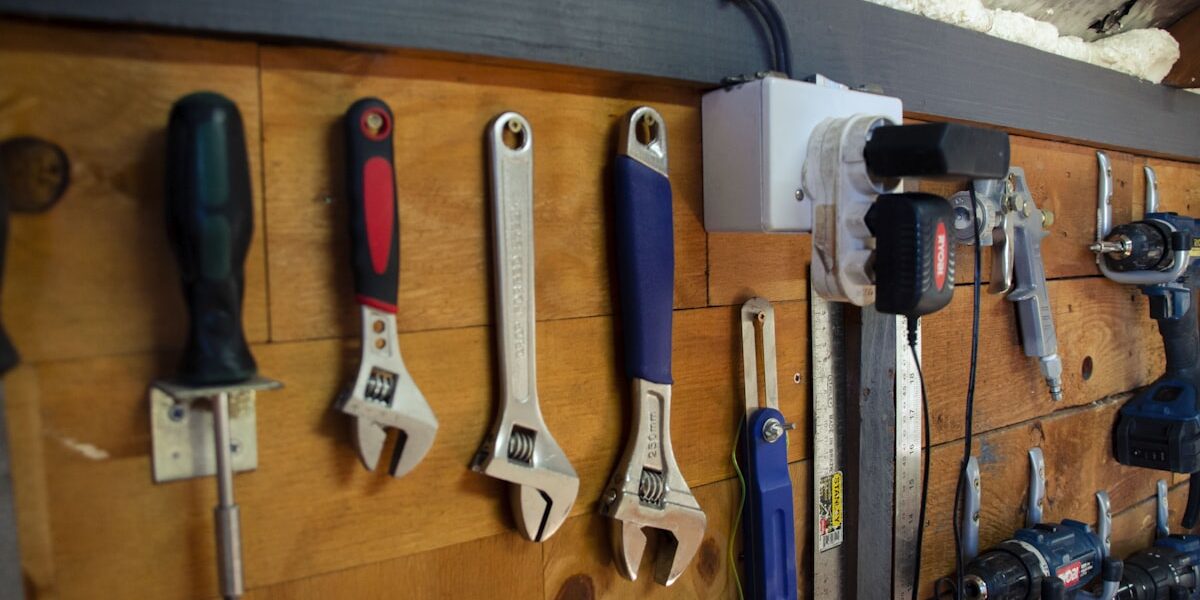
That’s what makes French cleats so useful to workshop owners — the system lets you rearrange your wall organization without committing to anything permanently. Tool racks, cabinets, shelf units, jig holders, power strip mounts — all of it slides along the wall cleat and repositions in seconds. When your workflow changes, the storage changes with it.
In home settings, the same principle applies to hanging art, mirrors, and heavy decor items. The floating appearance when done cleanly looks intentional, and the swap-out capability works well for people who redecorate regularly or for renters who want to minimize wall damage.

Why They Actually Work
- Load capacity: Properly installed, a French cleat handles substantial weight. The cleat spreads load across its length rather than concentrating it at a single fastener point like a standard hook.
- Installation: Once the wall section is up and level, adding new hangers is a matter of minutes rather than measuring and drilling new holes.
- Flexibility: Move items along the wall without tools. Rearranging a full French cleat wall takes twenty minutes rather than an afternoon of drilling and patching.
- Clean appearance: The hangers are hidden behind the tool or cabinet, creating the floating-against-wall look that pegboard can’t achieve.
Building the Cleat System
The table saw handles the 45-degree rip cleanly. Set the blade to 45 degrees, use a reliable fence, and rip your plywood strips to width (typically 3″ to 4″ for wall sections). Cut matching pieces for the tool holders as you build them.
Mounting the wall cleats requires hitting studs for maximum holding power. A level line across the whole wall before you start saves frustration later. I use a long straightedge and mark stud locations with pencil before driving any screws. Space your wall cleat rows based on what you’re hanging — 8″ to 12″ apart covers most shop tool holders and cabinets.
Organizing the Shop
The real power of French cleats in a workshop is the tool holder inventory you build over time. Wish I’d started this sooner: I spent one winter building a set of holders for every hand tool in my shop, and now everything has a dedicated position on the wall. Hand planes mounted on angled holders, saw till with individual slots for each saw, chisel rack, marking gauge holder — every tool visible and accessible.
Kitchens and garages benefit from the same approach. Spice racks and knife strips on French cleats in a kitchen. Bin systems and shelf sections for the garage. The modular nature lets you evolve the storage as your needs change without replanning the whole wall.
Creative Applications
Fold-away benches mounted on French cleats give you a work surface when needed and wall space back when you don’t. Lighting rigs that adjust position without rewiring. Vertical display walls for art or collections where items swap in and out regularly. DIY builders have applied the cleat principle to problems far beyond simple tool storage, and the system handles most of them well.
Maintenance and Safety
Check the screws holding the wall cleats periodically — especially in the first year while the studs settle. The connection between wall cleat and holder is purely mechanical, so any loosening in the mounting screws matters. Verify that heavy items are loading the cleat correctly (bevel to bevel, not just resting on top) before trusting the setup with anything valuable or dangerous. For items over 50 pounds, add a secondary safety catch rather than trusting the cleat alone.
Where the System Is Going
French cleat walls have expanded from traditional woodworking shops into maker spaces, garage workshops, craft rooms, and home offices. The design principle is durable and the materials are cheap — that combination tends to stick around regardless of trends. The system’s adaptability makes it relevant for whatever storage problem you’re currently solving, not just the one you anticipated when you first built it.
Recommended Woodworking Tools
HURRICANE 4-Piece Wood Chisel Set – $13.99
CR-V steel beveled edge blades for precision carving.
GREBSTK 4-Piece Wood Chisel Set – $13.98
Sharp bevel edge bench chisels for woodworking.
As an Amazon Associate, we earn from qualifying purchases.


Stay in the loop
Get the latest wood working workshop updates delivered to your inbox.