I’ve helped dozens of people set up their first workshops over the years. Here’s the comprehensive guide I wish someone had given me when I started out. We’ll cover space, tools, layout, safety, and budgeting – everything you need to get building.
Assessing Your Space
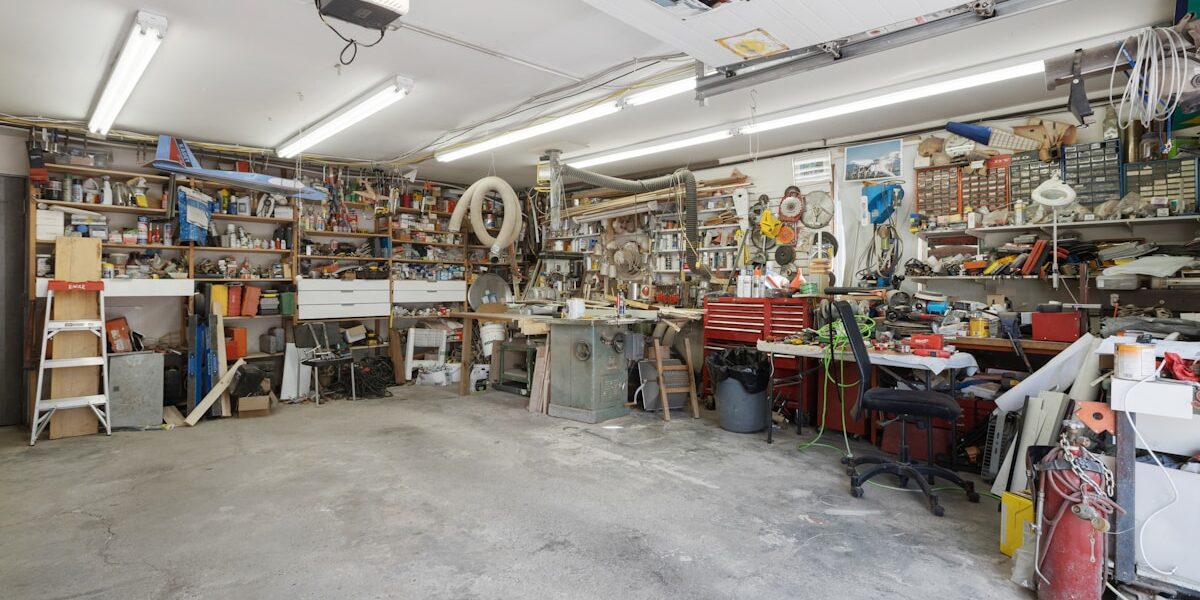
Before buying a single tool, you need to honestly evaluate what you have to work with. The space dictates everything else.
Garage Workshops
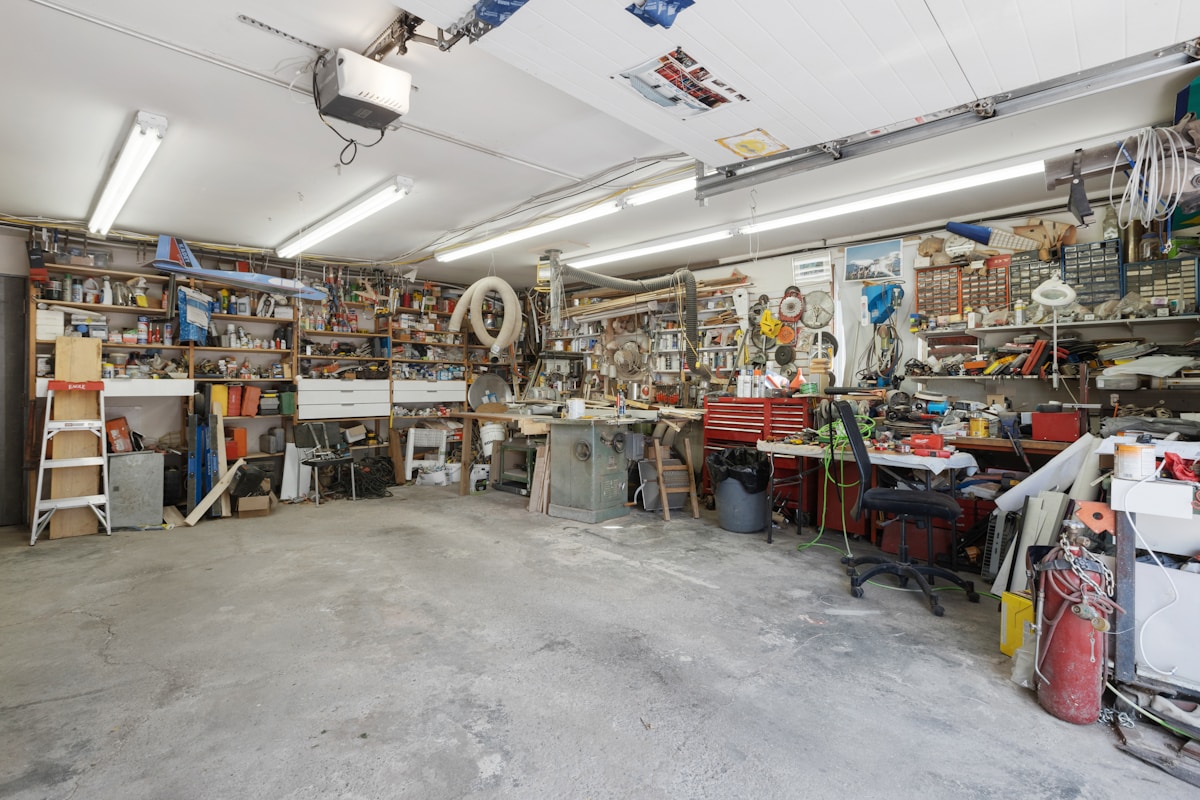
The most common option. A single-car garage (roughly 12×20 feet) is tight but workable. A two-car garage is comfortable for most hobbyists.
Challenges: Temperature extremes, dust getting into the house, competing with vehicles for space. You’ll likely need to move things around depending on what you’re working on.
Solutions: Install a garage door threshold seal to keep weather out. Use mobile bases on large tools so you can reconfigure the space. Consider a shop partition to contain dust if the car needs to stay.
Basement Workshops
Climate controlled year-round, which is a major advantage. But dust management becomes critical – it will find its way into your living space if you’re not careful.
Challenges: Moving large lumber and finished pieces through the house, low ceilings in some basements, dust control, noise traveling through the floor.
Solutions: Dedicated dust collection is non-negotiable. Consider a separate entrance if possible. Ceiling-mounted air filtration helps. Let family members know before you start noisy operations.
Shed or Outbuilding
Dedicated space is ideal but requires the most initial investment. You’ll need to run electrical, possibly add heating/cooling, and ensure the structure can handle the loads.
A 12×16 shed is a good minimum size for a functional shop. 16×20 or larger is more comfortable for serious work.
Minimum Viable Space
You can work in surprisingly small spaces if you’re strategic. I’ve seen productive shops in single-car garages and even large closets. The key is choosing appropriate tools and being willing to work outside for large assemblies.
The absolute minimum for basic woodworking: enough room for a workbench, a single power tool (usually a table saw or track saw), and space to maneuver full sheets of plywood if you’ll be using them.
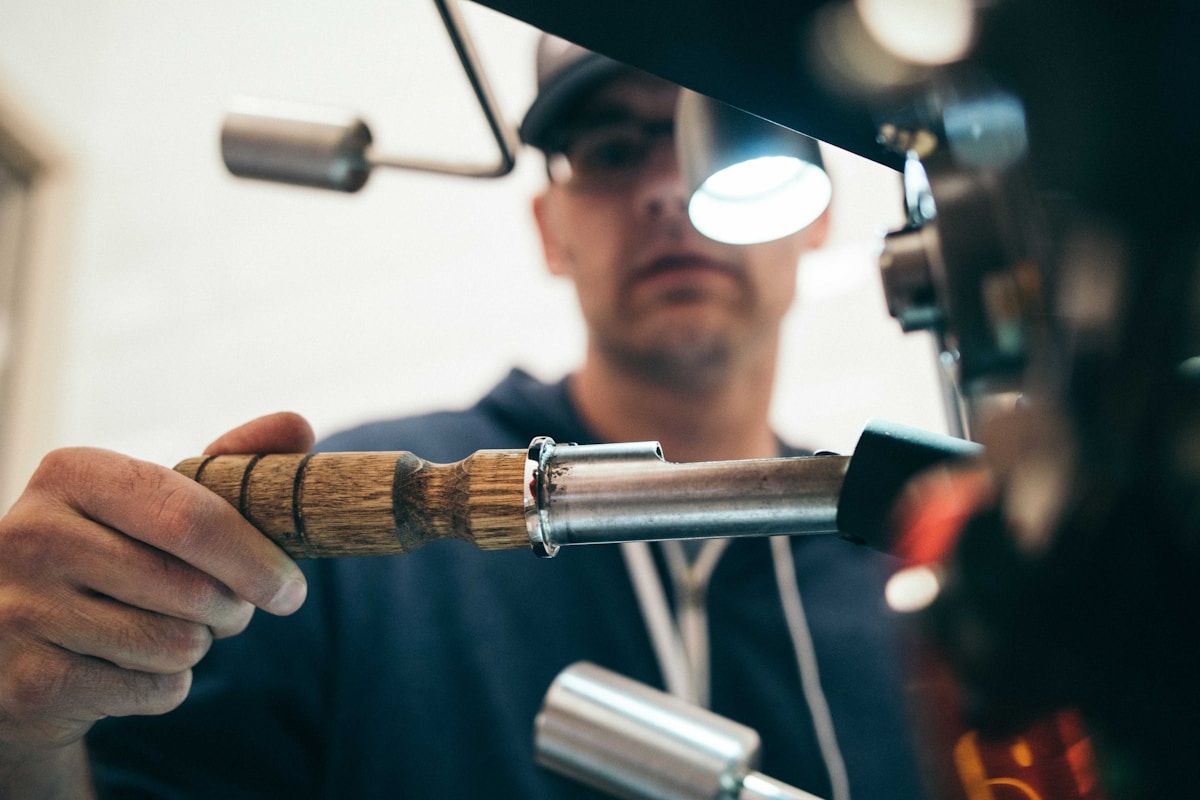
Essential Tools: The Foundation
Forget the marketing about must-have tools. Here’s what actually matters when you’re starting out.
A Solid Workbench
This is your most important tool. It doesn’t need to be fancy – a 2×4 frame with a plywood or MDF top works fine. What matters: it should be heavy enough not to move, the right height for you, and large enough to support your work.
Height guideline: stand straight with your arms at your sides, then bend your elbow 90 degrees. Your bench top should be at that wrist height, maybe slightly below.
Build your bench as your first project. You’ll learn fundamentals and end up with a tool that serves you for years.
Measuring and Marking
A quality tape measure (25-foot, 1-inch blade), a combination square, and a reliable marking tool. That’s really all you need to start. Add a long straightedge for checking flatness.
Don’t cheap out on the square. A cheap combination square that’s not actually square will cause problems on every single project. Spend $30-40 on a good one and verify it’s accurate when you get it.
Cutting Tools
For a first shop, I recommend either a quality circular saw with a straightedge guide, or a track saw if budget allows. Both can handle sheet goods and dimensional lumber accurately.
A table saw is incredibly useful but not strictly necessary for a beginner. If you do buy one, make sure it has a good fence and you understand proper safety techniques before using it.
A hand saw and a Japanese pull saw cover many situations. They’re quiet, create no dust, and can go places power tools can’t.
Drilling and Driving
A cordless drill/driver is essential. Get a quality 18V or 20V (same thing, different marketing) with at least two batteries. The second battery is crucial – there’s nothing more frustrating than a dead battery mid-project.
A basic set of twist drill bits and driver bits covers most needs. Add forstner bits if you’ll be drilling clean flat-bottomed holes.
Joining and Assembly
A pocket hole jig like the Kreg K4 opens up a world of strong, easy joinery. Not traditional, but it works and gets beginners building real projects fast.
Quality clamps are worth the investment. Start with four 12-inch bar clamps and four 6-inch bar clamps. Add more as you need them. There’s a saying: you can never have too many clamps.
Shaping and Smoothing
A random orbit sander with 5-inch pads is the workhorse for most smoothing work. Spend a bit more for a quality model with good dust collection – you’ll use this tool constantly.
A block plane is surprisingly useful even in a power tool shop. Edge work, chamfers, fitting doors – nothing beats a sharp plane for these tasks.
A set of chisels (1/4″, 1/2″, 3/4″, 1″) handles most detail work. Budget chisels work fine if you learn to sharpen them. Expensive chisels just hold their edge longer.
Tool Organization and Storage
A disorganized shop is an unproductive shop. Worse, it’s a dangerous one – you can’t work safely when you’re tripping over tools.
Wall Storage
Pegboard is classic for good reason. Cheap, flexible, and you can rearrange it as your tool collection changes. French cleats are another excellent option that can support heavier items.
Whatever system you use, the goal is seeing your tools. If something’s buried in a drawer, you won’t use it.
Mobile Tool Bases
In a small shop, mobility is essential. Put your table saw, bandsaw, planer, and any other large tool on mobile bases. When you need floor space for assembly, you can push machines against the wall.
DIY mobile bases work fine. Commercial ones are more convenient. Either way, being able to roll heavy tools around transforms a small shop.
Lumber Storage
Horizontal racks keep lumber flat and organized. Build them high on the wall to free up floor space. Short offcuts go in a vertical bin – you’ll use them eventually.
Keep lumber off the ground. Moisture will wick up through concrete and into your boards.
Hardware Organization
Those multi-drawer plastic organizers are worth every penny. Sort screws, nails, and hardware by type and size. Label everything. When you need a specific screw, you should be able to find it in seconds.
Shop Layout Principles
How you arrange your space affects productivity and safety more than you might expect.
The Work Triangle
Your main workbench, table saw (or primary cutting tool), and assembly area should form a triangle with easy movement between them. You’ll travel this path thousands of times.
Keep this path clear. No cords to trip over, no clamps sticking out at knee height, nothing that will catch a board you’re carrying.
Outfeed and Infeed Space
Every tool needs room in front of and behind it. A table saw cutting 8-foot boards needs 16 feet of clear space. Plan for your longest material.
Outfeed tables that serve multiple tools make efficient use of limited space. A single large table can catch output from your table saw, planer, and bandsaw if positioned correctly.
Dust Collection Routing
Plan your dust collection paths before you finalize tool positions. Every tool that makes dust (which is most of them) should be within reach of your collection system.
Flexible hose is convenient but reduces airflow. Hard pipe is more efficient but less flexible. Many shops use a combination: hard pipe to strategic locations, flex hose for the last few feet.
Lighting
Workshops are usually under-lit. Good lighting reduces eye strain, improves quality of work, and is safer. LED shop lights are cheap and effective – add more than you think you need.
Aim for even coverage that minimizes shadows. Task lighting at your workbench helps for detail work.
Electrical
More circuits than you think you need. A table saw, dust collector, and shop vac running simultaneously can easily trip a single 15-amp circuit.
Plan outlets at bench height so you’re not constantly bending over. Add a few ceiling-mount outlets for tools in the middle of the room.
Safety Equipment and Practices
No piece of furniture is worth an injury. Set up your safety systems properly from the start.
Eye Protection
Safety glasses every time you’re in the shop. Every. Single. Time. Get comfortable ones you don’t mind wearing.
Keep multiple pairs – at the shop door, at your workbench, by the table saw. The easier they are to grab, the more likely you’ll use them.
Hearing Protection
Power tools cause permanent hearing damage faster than you think. Any tool louder than a normal conversation needs hearing protection.
Foam plugs work but can be annoying to insert constantly. Ear muffs are faster to put on and take off. Pick what you’ll actually use.
Dust Protection
The fine dust you can’t see is the most dangerous. It causes long-term lung damage and health issues.
At minimum, wear an N95 mask when sanding or using power tools. Better is a half-face respirator with proper filters. Best is a powered air-purifying respirator, though these are pricey.
Dust collection at the source (on your tools) reduces what gets into the air. An ambient air cleaner hanging from the ceiling catches what the tool collection misses.
First Aid
Keep a first aid kit in the shop. Not in the house – in the shop where you’ll actually need it. Include bandages, gauze, medical tape, and a tourniquet. Learn how to use everything in it.
Have a charged cell phone accessible. If something goes wrong, you may need to call for help.
Fire Safety
Keep a fire extinguisher rated for wood, paper, and electrical fires (ABC type) within easy reach. Know how to use it before you need it.
Oily rags are a real fire hazard – they can spontaneously combust. Hang used rags outside to dry or store in a metal container filled with water.
Dust Collection Systems
Dust is both a health hazard and a nuisance that gets into your finish. Address it properly from the start.
Shop Vacuums
Fine for hand tools and light work. Get one rated for fine dust and add an aftermarket filter upgrade. Connect it to sanders and small tools.
Not adequate for table saws, planers, or jointers – they produce too much waste for a vacuum to handle.
Single-Stage Collectors
The common 2HP units with a bag on top. Adequate for most hobby shops if sized correctly. The bag filters can be upgraded to improve fine dust capture.
Plan on 4-inch duct to your tools with blast gates to direct suction where you need it.
Two-Stage Collectors
A cyclone separator before the filter dramatically extends filter life and improves performance. You can add a cyclone lid to a bucket as a cheap DIY version, or buy a dedicated two-stage unit.
Sizing
More CFM is better, but the ductwork often matters more than the collector rating. Short, straight runs with minimal diameter restrictions move more air than a powerful collector fighting long, bent pipes.
Budget Planning
Getting started doesn’t have to break the bank, but you should plan for realistic costs.
Minimum Viable Workshop Budget
You can start with essential hand tools and a circular saw for under $500:
- Basic hand tools (square, tape, hand saw, chisels, plane): $150
- Circular saw with guide: $150
- Cordless drill: $100
- Clamps: $50
- Workbench materials: $50
Comfortable Starter Workshop
Add a table saw and random orbit sander for around $1500 total:
- Everything above: $500
- Contractor table saw: $400-600
- Random orbit sander: $100
- Shop vacuum: $100
- Pocket hole jig: $150
- Additional clamps and accessories: $150
Where to Invest
Spend more on the table saw – it’s the heart of most shops. A wobbly cheap saw with a bad fence will frustrate you on every project.
The workbench should be built, not bought. That saves money and teaches fundamental skills.
Hand tools can be bought used. Estate sales and flea markets often have old tools in excellent condition for pennies on the dollar.
Where to Save
Sandpaper and consumables: buy in bulk online for much less than hardware store prices.
Lumber: Find a local mill or hardwood dealer instead of big box stores. Better quality, lower prices, more selection.
Accessories like jigs and fixtures: make your own. It’s good practice and saves money.
Workflow and Habits
A successful shop isn’t just about tools – it’s about habits that keep you productive and safe.
Clean as You Go
Spend the last 15 minutes of every session cleaning. Sweep chips, empty the dust collector, put tools away. Walking into a clean shop the next day keeps you motivated.
Maintain Your Tools
Sharp blades cut better and safer. Clean tools work better and last longer. Spend a few minutes after each project on maintenance.
Keep a can of paste wax handy for cast iron surfaces. A quick wipe prevents rust and helps material slide smoothly.
Project Planning
Before cutting any wood, plan the project. Sketch it out, make a cut list, estimate lumber needs. Starting without a plan leads to wasted material and frustration.
Take Your Time
Rushing causes mistakes and injuries. If you’re tired, frustrated, or pressed for time, stop. The project will be there tomorrow.
Building Your Skills
Tools don’t make good woodwork – skills do. Invest in learning alongside your tools.
Start Simple
Your first projects should be simple and forgiving. A basic shelf, a shop storage unit, a small box. Master the fundamentals before attempting furniture.
Learn from Mistakes
You will mess up. Every woodworker does. What matters is learning from it. When something goes wrong, figure out why and how to prevent it next time.
Resources
YouTube channels like Paul Sellers, Jonathan Katz-Moses, and Wood Whisperer offer excellent free instruction. Woodworking magazines like Fine Woodworking are worth the subscription for the detailed articles.
Local woodworking clubs offer hands-on learning and mentorship from experienced makers. Most welcome beginners enthusiastically.
Growing Your Shop
As your skills develop, your shop will evolve. Don’t try to buy everything at once.
Let projects drive purchases. Need to resaw lumber? That’s when a bandsaw makes sense. Doing a lot of edge jointing? Time for a jointer. Buying tools before you need them means they sit unused.
With each new tool, re-evaluate your layout. What worked with three machines might not work with six. Stay flexible and rearrange as needed.
Final Thoughts
Setting up a workshop is a project in itself – and it’s never really finished. The best shops evolve over years as their owners’ skills and needs change.
Start with less than you think you need. Build skills and add tools gradually. Focus on fundamentals over gadgets.
The goal is building things, not accumulating tools. A skilled craftsman with basic tools will outproduce a beginner surrounded by expensive equipment every time.
Now stop reading and go build something.


Stay in the loop
Get the latest wood working workshop updates delivered to your inbox.