French Cleat Wall: The Best Thing I Ever Did for My Shop
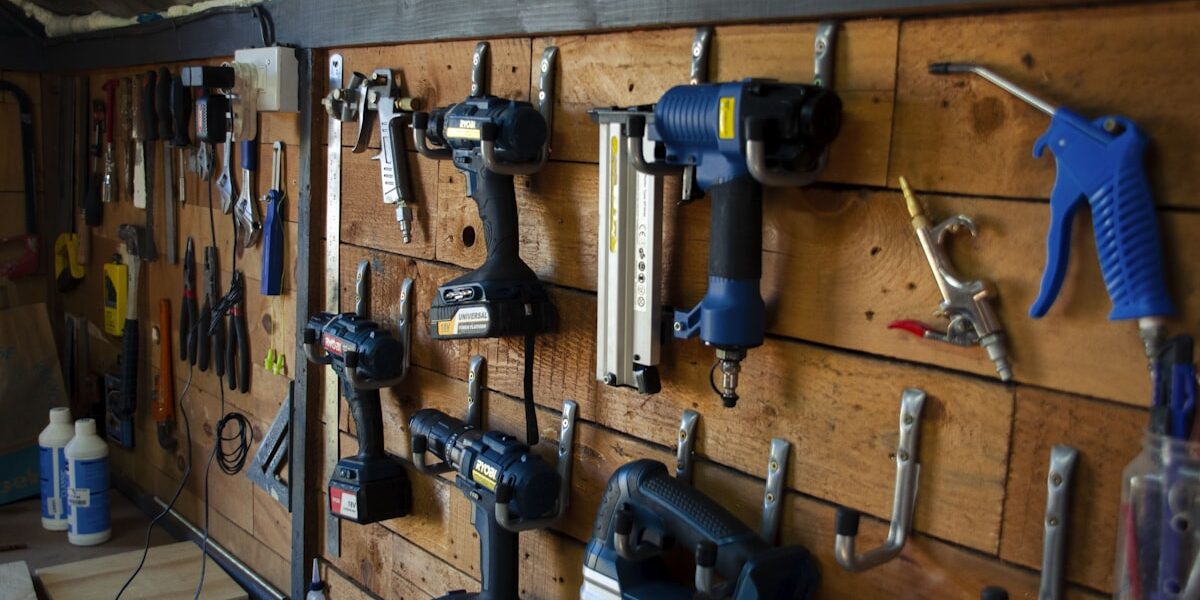
I had a shop organization problem that got out of hand fast. Tools on shelves I couldn’t reach, stuff piled on benches, jigs that took ten minutes to locate. I finally built a French cleat wall about six years ago and it changed the whole shop. Simple concept, incredibly strong, rearrange everything whenever you feel like it. Still holds everything from my heaviest planes to random jigs I built on a whim.
Origins and Basic Concept
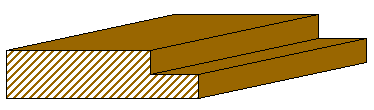
This isn’t some trendy new thing. Cabinetmakers and woodworkers have been using French cleats for centuries. The idea is dead simple: take two pieces of wood, rip them both at 45 degrees, and they interlock. One strip goes on the wall with the bevel facing up. The matching strip goes on whatever you want to hang, bevel facing down. Gravity does the rest.
I remember the first time I saw one in action at an old-timer’s shop in Vermont. The guy had every single hand tool organized on his wall, and he could grab any of them without looking. That’s when I knew I needed one.
What You’ll Need
- 3/4″ plywood ripped into strips — I use 3.5-inch wide strips for the wall cleats.
- Wood screws long enough to hit studs — 3 inches minimum, and don’t be shy about it.
- A table saw for the 45-degree rip cuts.
- A level — don’t eyeball this, please.
- Measuring tape.
Metal cleats are available if you’re hanging seriously heavy stuff. I used aluminum cleats for my lumber rack and they’ve held up perfectly for years.
How to Build Your French Cleat Wall
It’s easier than most people think.
Figure out how much wall space you want to cover. I went floor to ceiling on one wall and it was the best decision I made for that shop. Measure the space and plan your cleat spacing — I space mine about 3 inches apart. Set your table saw blade to 45 degrees and rip each board down the middle. Two pieces from every board — one for the wall, one for what you’re hanging.
Mount the first wall cleat level. Screw into studs, two screws per stud. These hold real weight and the screws need to be in solid wood. Keep going up the wall, spacing evenly. For the hanging pieces, attach the mating cleat to whatever you’re building — a tool holder, shelf, or bin. Match the angle, hook it on the wall, done.
Why the System Works
- Total flexibility: Rearrange your whole shop in five minutes. Nothing is screwed down permanently.
- Real strength: The design distributes load efficiently. I hang cast iron hand planes without a second thought.
- Everything visible: No digging through drawers. Every tool is right there.
- Completely customizable: Build holders for specific tools, make shelves any size you need, add bins wherever they make sense.
Where French Cleats Work
Workshops and Garages
My shop cleat wall holds chisels, saws, clamps, squares, marking gauges — basically everything I reach for regularly. In the garage, a separate cleat wall for yard tools, ladders, and storage bins freed up a ton of floor space.
Living Spaces

My wife asked me to install a cleat system in our kitchen for pots and utensils. The cleats hide behind whatever you hang, so it looks clean. Works beautifully for artwork — swap pieces around without putting new holes in the wall every time.
Retail and Display Spaces
I’ve built cleat walls for a couple of local shops. They love being able to completely change product displays without new fixtures. Seasonal changes, promotions — just move things around.
Planning Your Layout
Put the heavy stuff lower. I keep hand planes and heavier tools at waist height, lighter stuff up top. Looks better balanced and you’re not lifting heavy things above your head. The fun part is building custom holders — dedicated racks for chisels, slot holders for hand saws, swing-out panels for clamps. Once you start thinking this way you can’t stop.
Maintenance and Expansion
Check your wall screws once a year, tighten anything that feels loose. That’s about it. Expanding is trivial — need more space, add another row of cleats. Need to reorganize, pick stuff up and move it. I’ve reconfigured my wall probably a dozen times and each time takes maybe twenty minutes.
Recommended Woodworking Tools

HURRICANE 4-Piece Wood Chisel Set – $13.99
CR-V steel beveled edge blades for precision carving.
GREBSTK 4-Piece Wood Chisel Set – $13.98
Sharp bevel edge bench chisels for woodworking.
As an Amazon Associate, we earn from qualifying purchases.


Stay in the loop
Get the latest wood working workshop updates delivered to your inbox.