
Oak, ash, and mahogany have something in common that maple and cherry don’t: open grain. Those visible pores create texture and character that closed-grain woods lack, but they also create finishing challenges that trip up even experienced woodworkers.
I’ve spent years learning to work with open-grain species, and the approaches that work differ fundamentally from finishing closed-grain lumber. What follows is hard-won knowledge from countless finishing disasters and occasional successes.
What Open Grain Actually Means
Look at the end grain of a piece of red oak under magnification and you’ll see vessels—tubes that carried water when the tree was alive. These vessels run the length of the board, creating visible pores on the face and edges. In ring-porous woods like oak and ash, the early-season vessels are especially large, creating distinct grain lines.
Closed-grain woods like maple and cherry have vessels too, but they’re too small to see without magnification. Their surfaces appear smooth and uniform. Apply finish and it sits on top, creating an even film.
Open-grain woods absorb finish into those pores. Without preparation, the finish sinks unevenly, leaving shiny spots and matte streaks. The texture changes unpredictably. What looked like a consistent color in the can becomes a blotchy mess on the wood.
The Filled vs. Unfilled Decision
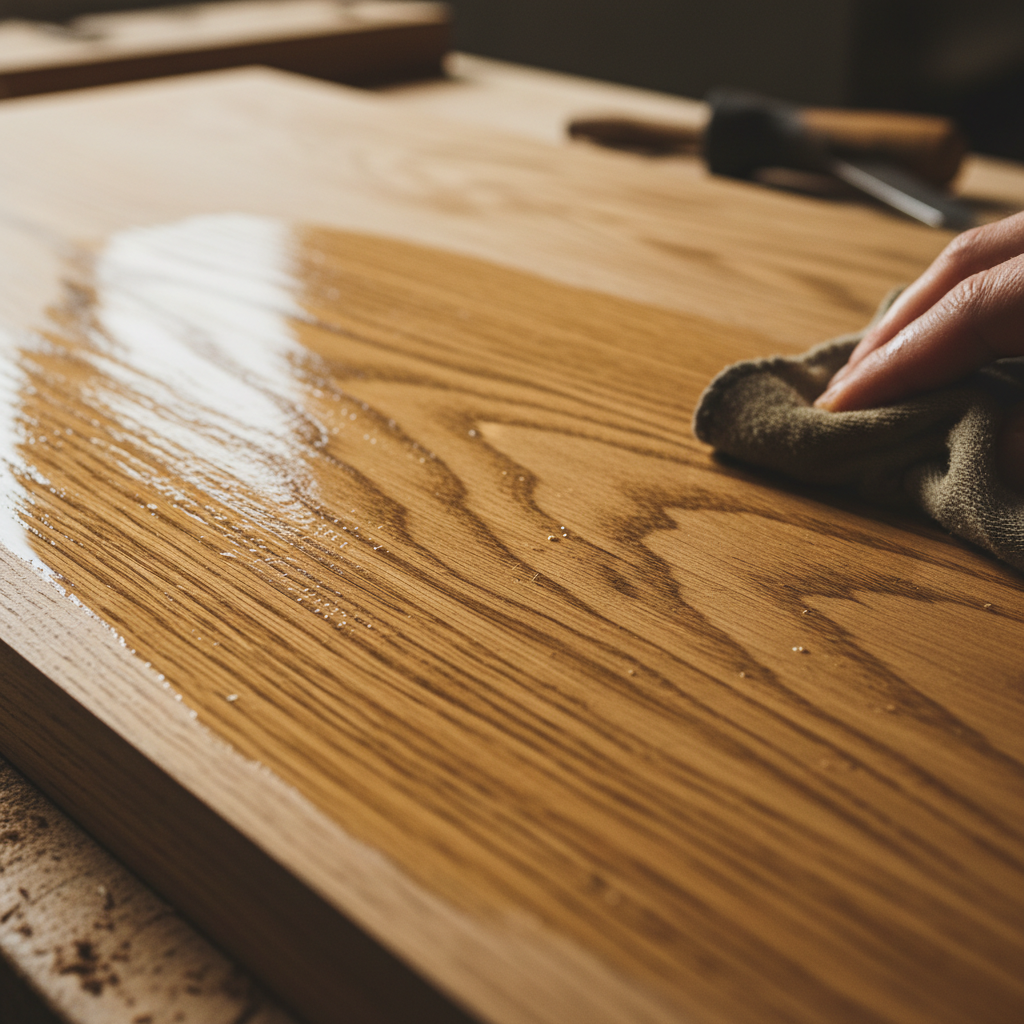
Traditional fine furniture often features filled open grain—the pores leveled with paste or gel filler until the surface feels smooth. Think of a glossy mahogany dining table where your hand glides across without catching on texture. That’s pore-filled finishing.
Modern tastes sometimes favor unfilled grain—the natural texture left visible and tactile. Craftsman-style oak furniture, rustic tables, and pieces where the wood’s character should remain prominent often skip the filling step. The pores show; the texture exists; the wood looks like wood.
Neither approach is correct or incorrect. The choice depends on the piece, the wood species, and the aesthetic you’re pursuing. Mahogany looks strange unfilled; white oak looks strange too filled. Understanding the conventions helps inform the decision.
Grain Filling Basics
Paste wood filler is thick material that you work into the pores, then scrape and wipe away from the surface. The filler remains in the pores; the wood surface stays clean. After proper application, the surface feels smooth despite the naturally porous wood underneath.
Colors matter. Filler can match the wood color for subtle pore filling, or contrast for dramatic effect. Dark filler in light oak creates those visible dark grain lines that Arts and Crafts furniture is known for. Natural filler in mahogany minimizes the pores while maintaining consistent color.
Application technique separates good fills from bad ones. Work the filler across the grain first, pushing it into the pores. Then remove excess by scraping with the grain using a plastic spreader or old credit card. Wipe with burlap in circular motions to remove surface residue without pulling filler from the pores.
Timing is critical. Work in small sections—maybe two square feet at a time—so the filler doesn’t dry before you can remove the excess. Once it hardens on the surface, removal becomes a nightmare involving solvents and scrapers.
Oil-Based vs. Water-Based Fillers
Traditional oil-based fillers have longer working times, which forgives slower technique. They sand easily after drying and accept most oil-based finishes without compatibility issues. The downside: they take forever to dry—sometimes 24-48 hours—and the solvents smell terrible.
Water-based fillers dry faster, smell less, and clean up with water. But faster drying means less working time, and the hardened filler can be trickier to sand smooth. Compatibility with water-based topcoats is excellent; mixing with oil-based products requires more caution.
I’ve used both extensively. For large projects like tables where I’m filling for hours, oil-based wins on workability. For smaller pieces where speed matters, water-based works fine if I move quickly.
Skipping the Filler
Not every open-grain project needs pore filling. When the goal is highlighting natural texture rather than creating glass-smooth surfaces, leaving the grain open makes sense.
Oil finishes work beautifully on unfilled open grain. Danish oil, tung oil, and linseed oil blends penetrate into the pores rather than sitting on top. The wood looks wet; the texture remains. Additional coats build sheen without obscuring the natural character.
Wipe-on polyurethane accomplishes something similar with more protection. The thin consistency allows penetration into pores on early coats, then subsequent coats build film without completely leveling the texture. The result is a protected surface that still feels like wood.
Spray lacquer on unfilled grain creates an interesting effect—the finish follows the topography, building slightly thicker in pore recesses. Under certain lighting, this creates depth and visual interest that filled surfaces lack.
Staining Open-Grain Woods
Stain behaves differently on open grain than closed grain. The pores absorb stain readily, often more deeply than surrounding wood. Without careful technique, the grain lines end up dramatically darker than the rest of the surface.
Gel stains reduce this problem. Their thick consistency doesn’t penetrate deeply, delivering more even color. The trade-off: less grain emphasis and slightly artificial appearance compared to penetrating stains.
Sealing before staining—with dewaxed shellac or a sanding sealer—limits penetration into the pores. This evens out absorption but reduces the stain’s overall color impact. Experimentation on scrap is essential before committing to a technique on the actual project.
Dye stains instead of pigmented stains often work better on open grain. Dyes are dissolved colorants that penetrate evenly regardless of grain structure. Pigmented stains are suspended particles that lodge more heavily in pores. For consistent color on oak or ash, dyes typically produce better results.
Building Film Finish on Open Grain
Creating that glossy, filled look with film finishes requires patience. The first several coats sink into pores rather than building film on the surface. Only after the pores are essentially full does visible sheen develop.
Sand between coats, but understand that you’re sanding off material faster than you’re adding it on open grain. Each pass removes finish from high spots while leaving it in pore recesses. The surface eventually levels, but it takes more coats than you expect.
Lacquer builds faster than polyurethane or varnish for this reason. Multiple thin coats can be applied in a single day, accumulating material that eventually fills the pores. Varnish’s longer dry time means fewer coats per day and slower progress toward a smooth surface.
What I Actually Do
My default approach for open-grain furniture that will see heavy use: fill with oil-based paste filler, wait 48 hours, sand with 320 grit, apply stain if desired, then topcoat with spray lacquer or wipe-on poly. The filled surface takes the topcoat evenly and produces results that clients expect from fine furniture.
For rustic or Craftsman pieces where texture matters: skip the filler, apply penetrating oil finish, add wax for sheen. The wood stays wood. Clients who want that aesthetic appreciate the honesty of visible grain.
For anything in between—pieces where modest smoothness is acceptable but glass-like perfection isn’t required—I apply thin dewaxed shellac, sand lightly, then finish with oil-based varnish. The shellac partially fills pores and provides a good foundation without the labor of paste filling.
Open-grain woods reward understanding their nature and working with it rather than against it. Whether you choose to fill or leave natural, the finish quality depends on recognizing what the wood wants to do and planning accordingly.


Stay in the loop
Get the latest wood working workshop updates delivered to your inbox.