As someone who has put together several versions of a portable kit over the years — and pared each one down from too heavy to actually useful — I learned what actually makes it into a working carpenter’s toolbox and why. Here’s what I know.
What Is a Carpenter’s Toolbox?
A carpenter’s toolbox is a portable collection of hand tools and supplies — the tools you can carry to any job rather than the full workshop setup. The concept is selection: what’s the minimum kit that handles the widest range of tasks without being so heavy you leave it in the truck?
The container itself comes in a few forms, each with tradeoffs:
- Traditional wooden toolbox: Often handmade, a mark of craftsmanship — and genuinely heavy once loaded
- Metal cantilever box: Durable with multiple fold-out trays, good for organized access
- Plastic organizer: Lightweight with visible compartments — easy to find things at a glance
- Soft-sided tool bag: Flexible and easy to carry when you need to move fast
- Rolling chest: For larger collections where the rolling makes up for the size
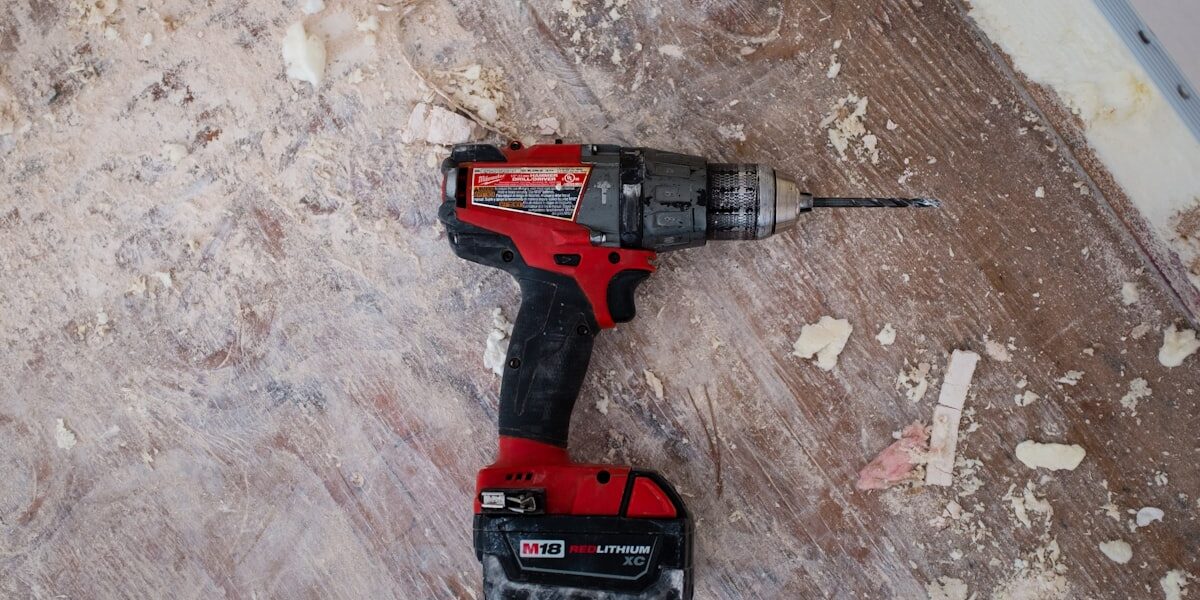
The Tools Every Carpenter’s Toolbox Needs
Measuring and Marking
Tape Measure (25-foot): The tape measure is the workhorse. A 25-footer handles most jobs while staying compact enough to clip to a belt. Blade rigidity matters — a wide blade that holds extended without folding saves constant frustration. I’ve burned through several cheap tapes and settled on one quality model that I treat well. Wish I’d done that earlier.
Combination Square: For marking 90° and 45° angles, checking corners, gauging depths, and a dozen other layout tasks. A quality square built to accurate tolerances pays for itself in accurate cuts over years of use. Cheap squares drift out of square and produce errors that compound through a project.
Carpenter’s Pencil: The flat shape prevents rolling off a surface. The thick lead shows clearly on rough lumber. Keep several — they disappear constantly and you don’t want to be hunting for one when you need it.
Chalk Line: For long straight lines quickly. Framing, flooring layout, any job where you need a reference line longer than a straightedge can produce.
Cutting Tools
Handsaw: When power tools aren’t practical, a quality 15″ general-purpose handsaw handles crosscuts and rip cuts. The handsaw isn’t the glamorous tool in the kit but it’s the one you reach for in places where setting up a circular saw isn’t worth it.
Utility Knife: Scoring lines, trimming materials, sharpening pencils in the field. A retractable blade design is safer in a shared toolbox. Replace blades before they’re truly dull rather than after — a sharp utility knife is a safe one.
Chisels (Set of 4): Sizes from 1/4″ to 1″ cover most joinery and cleanup tasks. Keep them sharp and protected with blade guards when in the box. A set of dull chisels is both useless and dangerous — the force required for dull chisels to cut is what causes the slip that becomes an injury.
Striking and Fastening
Claw Hammer (16-20 oz): The 16 oz version balances driving power and control for most work. The claw extracts nails and provides leverage for separation tasks. My shop buddy swears by a 20 oz for framing, but the extra weight adds up over a long day for finish work.
Screwdrivers: Phillips #1, #2, and medium and large flatheads at minimum. A 6-in-1 multi-bit driver saves pocket space if you’re trying to minimize the kit. Dedicated drivers in a full box give you better feel and torque transmission.
Nail Set: Sinks finish nails below the surface for trim work and furniture assembly. Small, light, and often forgotten until you need it — keep one in the kit permanently.
Layout and Leveling
Speed Square: Compact, practically indestructible, versatile for marking angles, guiding saw cuts, and checking square.
Level (9″ torpedo): Compact enough to fit in the toolbox and handles most leveling tasks in the field. Digital versions add precision for critical applications but the analog version is faster for quick checks.
Stud Finder: For working on walls. Electronic models detect wiring and plumbing pipes as well, which is genuinely safety-relevant.
Gripping and Holding
Adjustable Wrench (8″): Handles nuts and bolts across a range of sizes. Not the right tool for everything but genuinely useful when you don’t have the right dedicated wrench on hand.
Locking Pliers: Grip, clamp, hold — one-handed operation leaves the other hand free. Invaluable for stuck fasteners and improvised clamping in situations where you don’t have a real clamp handy.
Pry Bar (flat): Removes trim, separates boards, provides leverage. The flat bar fits the toolbox without taking up the space that a full-size bar would.
Consumables to Stock
Tools without supplies leave you stalled. Keep these in the box:
- Wood screws in common sizes (assorted box)
- Finish nails and brads
- Wood glue (small bottle)
- Sandpaper sheets (80, 120, 220 grit)
- Electrical tape and painter’s tape
- Safety glasses
- Work gloves
- Flashlight or headlamp
Building Your First Kit
Tape measure, hammer, screwdrivers, utility knife, and combination square — these five tools handle more tasks than you’d expect and make a functional starting kit. Add from there based on what your actual projects require rather than what a list says you should have.
Buy quality on the basics. A good tape measure and combination square last for decades with normal care. Cheap versions produce inaccurate measurements that undermine every cut you make with them — the cost difference is real but the accuracy payoff is larger than the price difference suggests.
Let your projects tell you what to add. When you find yourself wishing for a specific tool on multiple jobs, that’s the signal to buy it. Tools added in response to real need get used; tools added speculatively often end up taking up space.
Maintaining the Kit
A toolbox that’s ready to use when you reach for it requires routine attention:
- Keep cutting tools sharp — dull tools are frustrating and dangerous in equal measure
- Wipe metal surfaces with an oily rag to prevent rust, especially if the box lives in a humid environment
- Replace damaged handles before they fail completely — a split hammer handle or cracked chisel handle gives way at the worst moment
- Organize consistently so you can find things without hunting — knowing exactly where each tool lives saves real time over a career
- Restock consumables before running out, not after
The Bottom Line
A carpenter’s toolbox is a portable workshop — the tools that let you work effectively wherever you are rather than only in your shop. Start with the essentials, invest in quality where it matters, maintain what you have, and the kit serves you for decades. Many professional carpenters carry the same core tools they bought twenty or thirty years ago. That longevity is the real argument for buying right the first time.
The first major air show on American soil happened in January 1910 at Dominguez Field near Los Angeles, California, and it was a spectacle that almost didn’t happen, nearly killed several participants, and set the template for aviation exhibitions that persist to this day. The history involves a promoter willing to gamble everything, European aviators who had to be convinced to make an ocean crossing, and a public that had mostly never seen a functioning airplane.
The Context: America Was Behind
By 1910, aviation was moving faster in France than anywhere else. The Wright Brothers had made their historic flights in 1903, but they were secretive about their technology and their demonstrations were limited and infrequent. Meanwhile, French aviators — Blériot, Farman, Voisin — were pushing the boundaries of flight publicly and spectacularly.
Blériot had crossed the English Channel in July 1909, making him an international celebrity. The first major air show as a genuine competitive exhibition happened in Reims, France in August 1909, drawing enormous crowds and establishing aviation as a sporting spectacle. Americans were hungry for a domestic equivalent. The country had invented powered flight and was watching Europe run away with the sport.
Dick Ferris and the Gamble
Dick Ferris was a theatrical promoter who had managed hotels and organized events. He had no aviation background, but he understood audiences and spectacle. In late 1909, he began organizing what would become the first American aviation meet: a multi-day event at Dominguez Field, an agricultural area south of Los Angeles, scheduled for January 10-20, 1910.
The organizational challenges were considerable. Ferris needed aviators — and American aviators with aircraft capable of putting on a real show were essentially nonexistent at the required level. He had to recruit Europeans who had actually been flying competitively, including Louis Paulhan, a French aviator who was among the best in the world. Paulhan’s participation required negotiations with the Antoinette aircraft company, shipping arrangements for the aircraft, and assurances that the prize money Ferris was promising would actually be paid.
I’m apparently one of the few people who finds the prize money financing story more interesting than the flying itself. Ferris was guaranteeing tens of thousands of dollars in prizes while betting on ticket sales and sponsorships to cover the commitments. This was either visionary or reckless depending on how it played out — and it only played out well because 175,000 people showed up.
The Events: What Happened and What Almost Went Wrong
The Los Angeles International Air Meet ran from January 10 to 20, 1910. An estimated 175,000 people attended over the ten days — a remarkable number given Los Angeles’s population of approximately 320,000 at the time. For many attendees, it was the first airplane they had ever seen fly in person.
The flying was genuine and sometimes dangerous. Louis Paulhan set altitude records on multiple days. Glenn Curtiss, the American aircraft designer and pilot who would later be involved in patent disputes with the Wright Brothers, participated and demonstrated American aviators could compete. The Wright Brothers notably did not attend — they were in litigation with Curtiss and other aviators over patent rights.
Frustrated safety observers watching the event would have had much to comment on. The safety standards of 1910 aviation events would be unrecognizable to modern air show organizers — spectators were often within feet of landing aircraft, and the aircraft themselves had minimal crashworthiness. Several incidents occurred that could have been catastrophic but resulted only in damaged aircraft and frightened crowds. The near-disaster elements were real; that no one died was partly good judgment and partly good luck.
The Legacy
The financial outcome for Ferris was successful — the event covered its costs and paid its prizes, validating his gamble. More significantly, the Los Angeles International Air Meet demonstrated that aviation spectacle could draw mass audiences in America. It established the commercial model for air shows: prize competition to ensure genuine performance, public access to create revenue, and the spectacle of flight as the product.
The format that emerged in 1910 in Dominguez Field — multiple aircraft competing in multiple disciplines over multiple days before large public audiences — is recognizable in every air show from Oshkosh to Farnborough today. The safety standards are vastly different. The aircraft are almost inconceivably more capable. But the fundamental appeal of watching humans fly machines in spectacular ways has not changed at all since that January in Los Angeles, when most of the crowd was watching an airplane fly for the very first time.


Stay in the loop
Get the latest wood working workshop updates delivered to your inbox.