Table Saw Blade Wobble: Causes and How to Fix It
Table saw blade wobble has gotten complicated with all the conflicting advice flying around. As someone who’s been running table saws for fifteen years, I learned everything there is to know about tracking down wobble — the hard way, mostly. Today, I will share it all with you.
Most people guess their way through this. They swap the blade, crank the arbor nut, fiddle with the fence, and hope something sticks. Nothing does. That’s because they never actually diagnosed the problem. This guide walks through every realistic culprit — in the order you should check them — so you stop spinning your wheels and actually fix the thing.
How to Tell If Your Blade Is Actually Wobbling
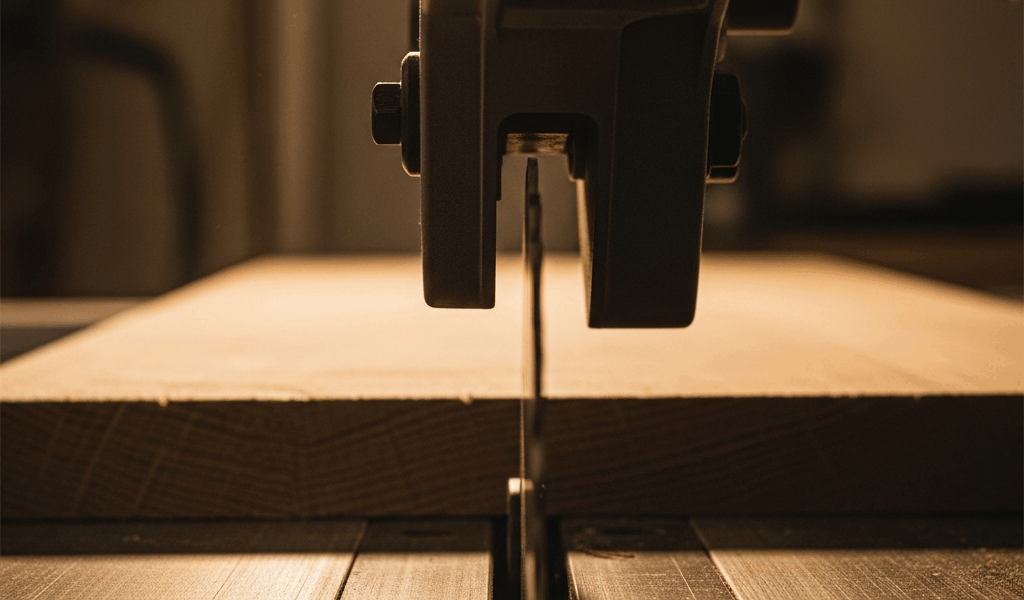
Before you tear into the saw, confirm you actually have wobble. Vibration from an unbalanced crosscut feels different from true blade runout. True wobble means the blade is moving side-to-side as it spins. Those are two different problems.
The dial indicator test is the gold standard here. A basic model — I use a Starrett 25-441 I picked up for around $22 — mounts to the table or fence rail. Spin the blade by hand and watch the needle. Movement beyond 0.015 inches, roughly the thickness of a credit card, means you’ve got a real problem worth chasing.
No dial indicator? The pencil test works fine. Mark a light line on the back of a tooth with a pencil. Spin the blade slowly by hand. Pencil stays on the line — you’re good. It bounces or loses contact — the blade is running out.
Probably should have opened with this section, honestly: I spent two full weeks diagnosing a wobble once, chasing it through every possible cause, before realizing the blade was perfectly fine. My fence was just slightly out of square. The “wobble” I heard was the workpiece catching on the back side of the blade. Check fence alignment with a decent straightedge before you assume anything.
Runout under 0.010 inches — acceptable. Between 0.010 and 0.025 inches, cut quality suffers but nothing catastrophic happens. Above 0.025 inches, you’ve got a real safety issue. Fix it.
Loose or Cross-Threaded Arbor Nut
This is the first thing to check. Easiest fix, most common cause — at least in my experience. The arbor nut clamps the blade tight against the flange. A loose nut lets the blade shift slightly as it spins, and that tiny shift translates directly into wobble at the cutting edge.
But what is the arbor nut thread direction? In essence, it’s opposite from what most people expect. But it’s much more than a minor detail — getting it backwards can strip your arbor. DeWalt, Makita, and Bosch use left-hand threads, meaning you tighten counterclockwise when facing the front of the saw. Some older Craftsman models and certain Deltas run clockwise. Check your manual. Thirty seconds now saves a ruined arbor later.
To check tightness, engage the arbor lock and grip a scrap wood block against a tooth for leverage. Try wiggling the nut with a wrench. It should not move. If it does, give it another quarter-turn.
Don’t make my mistake — I once torqued an arbor nut down with a pair of channel locks. Stripped the threads clean. You want snug, not gorilla-tight. Hand-tight plus a quarter-turn is the target. That’s it.
Cross-threading feels distinct. The wrench spins freely for two or three rotations, then suddenly binds hard. Stop immediately. Back it out, reset the nut straight on the threads, start over. Forcing a cross-threaded nut destroys the arbor, and an arbor replacement on a contractor saw runs $200 to $350 in parts and labor.
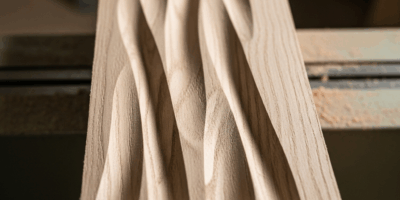
Warped or Damaged Blade
A bent blade produces wobble that feels identical to arbor problems. That’s what makes this step so frustrating to us troubleshooters — you can chase the arbor for an hour when the answer was sitting right in front of you the whole time. So, without further ado, let’s dive in.
Check the blade off the saw first. Lay it flat on your workbench or a piece of glass. Look for gaps between the blade plate and the surface, especially near the center. Under 0.010 inches of deflection — usually fine. Anything you can see clearly with the naked eye — pull it from rotation.
Heat buildup causes most blade warping. A dull blade forces you to push harder, which generates friction, which creates uneven heat expansion. The steel cools slightly warped and stays that way. This is why a $15 blade from a discount website wobbles after five cuts and a $40 Freud LU83R010 doesn’t. The difference is steel quality and heat treatment. Worth knowing before you grab whatever’s on sale.
Frustrated by repeated blade warping, I started tracking every blade I bought — brand, price, cut count before warping. I’m apparently cheap about the wrong things, and Freud works for me while generic house-brand blades never last more than a few sessions. The data made it obvious. Don’t make my mistake.
Pinching warps blades fast. When the workpiece binds on the back side of the blade, the steel flexes hard against a fixed point. One bad pinch can permanently dish a blade. If you hear squealing or the motor bogs down, stop immediately, clear the jam, and inspect the blade before the next cut.
Storage matters more than people think. Leaning a blade against a concrete wall for six months introduces a permanent curve. I store mine in individual blade cases — the cheap foam-lined ones run about $8 each — or on a wall-mounted rack that keeps them flat and separated.
Should you replace a borderline-warped blade or keep using it? A decent 10-inch blade runs $30 to $50. An hour of troubleshooting time costs more than that. I replace more than I keep. That’s the honest answer.
Debris or Damage on the Arbor Flange
This one surprises most people. Nobody thinks about the flanges — the two metal washers that clamp the blade from both sides. But what is flange contamination, really? In essence, it’s just sawdust and resin buildup in the wrong place. But it’s much more than that, because even a thin layer of pitch between the blade and flange tilts the blade off true and creates wobble that looks exactly like a bent blade or worn bearing.
Remove the blade and inspect both flanges carefully. The inner flange — the fixed one pressed onto the arbor shaft — and the outer flange should both be smooth, flat, and clean. Run a small straightedge across each face. Any gap means the blade won’t seat flat, full stop.
Pitch and sawdust accumulate surprisingly fast. Five minutes of cutting pine can leave enough resin buildup to matter. Clean both flanges with a rag and mineral spirits. Skip the wire brush — it scratches the bearing surfaces.
Small dings on the flange face are common, especially on older saws. A few light marks under 0.020 inches don’t usually cause problems. Deeper gouges do. A small file or 220-grit sandpaper can knock down a minor burr — work carefully and re-check with a straightedge after.
A bent inner flange is rare but not unheard of. Spin the saw by hand with the blade completely removed and watch the fixed inner flange rotate. It should track perfectly without any wobble. If it moves side-to-side, you’ve found your problem. That’s a professional repair — not a DIY fix, and worth being honest with yourself about.
Worn Arbor Bearings and When to Call It
Worn bearings are the reason some older saws develop wobble that simply won’t quit no matter what else you do. The bearings support the arbor shaft. When they wear, the shaft develops play — it moves side-to-side instead of spinning perfectly true. That movement transfers directly to the blade.
Test for bearing play with the blade removed. Grip the arbor shaft directly and try to wiggle it up, down, left, right. Zero movement — bearings are good. Any play at all — bearings are worn. The test takes about ten seconds and tells you immediately whether to keep looking or stop.
Spin the shaft by hand and listen. Bad bearings sound rough and sometimes feel notchy, like spinning a wheel with sand in it. A healthy bearing spins smooth and silent. That’s it — the difference is obvious once you know what you’re listening for.
Here’s the part that actually matters — the math. On a $300 job-site saw like a DeWalt DWE7485, bearing replacement probably isn’t worth pursuing. You’re halfway to a new saw. On a $1,200 Powermatic PM2000B, bearing service runs $150 to $300 at a reputable shop and buys you another five years of solid performance. On a $3,000 cabinet saw you run daily, there’s no question — fix it.
Get a quote before deciding. Most local saw repair shops charge $80 to $120 for a full inspection and estimate. That’s almost always cheaper than buying parts blind or discovering halfway through a DIY repair that the arbor itself needs replacement too. Call the shop first. That’s what makes this process endearing to us woodworkers — there’s usually a smarter path than just throwing parts at the problem.


Stay in the loop
Get the latest wood working workshop updates delivered to your inbox.