Why Stain Goes on Uneven in the First Place
Wood finishing has gotten complicated with all the conflicting advice flying around. Sand more. Use conditioner. Buy better stain. Everyone’s got a theory, and most of them are solving the wrong problem entirely.
As someone who spent two years finishing furniture before getting serious about woodworking, I learned everything there is to know about why stain goes on ugly. Today, I will share it all with you.
Here’s the short version: uneven stain absorption almost never means the stain is bad. It means the wood surface isn’t ready. Three things are actually going wrong beneath the surface:
- Mill glaze and planer burnishing seal the grain — When lumber gets milled, the planer blades compress the top layer of wood fibers instead of cutting cleanly through them. This burnished surface closes the pores that stain needs to penetrate evenly. The wood looks smooth. It isn’t open.
- Inconsistent sanding leaves micro-scratches at different depths — Skipping grits, using worn sandpaper, or changing sanding direction mid-project creates an uneven tooth. Coarse scratches hold stain differently than fine ones. You won’t see this until the stain goes on.
- End grain and face grain absorb at wildly different rates — End grain is like the side of a bundle of straws. Face grain is like looking at the bundle from above. Stain moves through end grain in seconds and face grain in minutes. That gap is where the blotching lives.
Probably should have opened with this section, honestly. Most people jump straight to “sand more” or “use conditioner” without knowing which problem they’re actually solving. That’s how you end up repeating the same mistake on board after board.
Is It a Blotching Problem or a Sanding Problem
Before you touch anything, figure out which failure you’re looking at. They look different — and they need completely different fixes.
Blotching looks like this
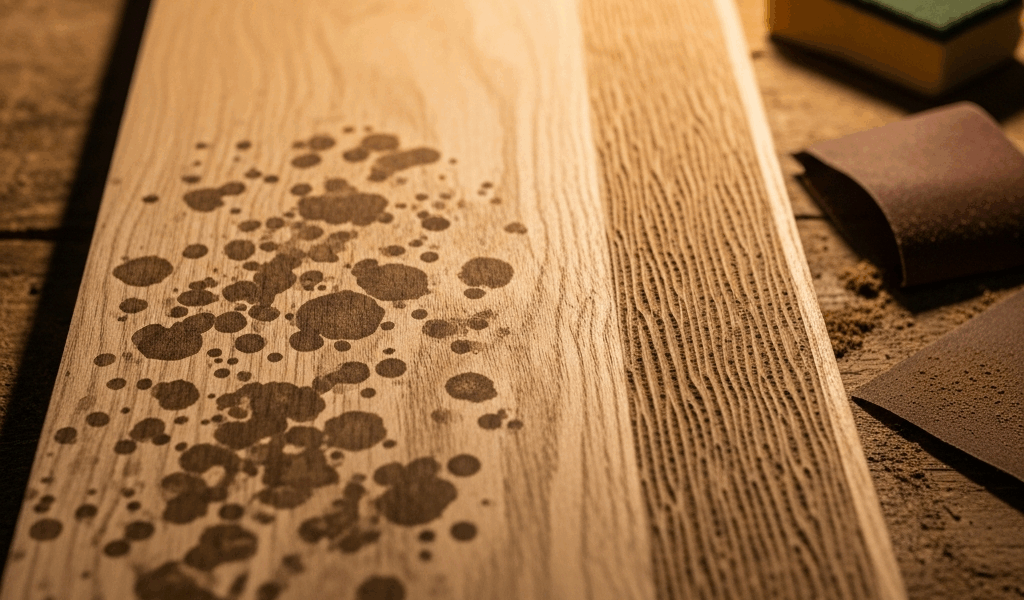
Dark, splotchy clouds appear randomly across the board. Pine, alder, cherry, and soft maple are the worst offenders. The stain seems to pool in certain areas and barely show up in others, even though you applied it evenly. The pattern is organic — not following any scratch marks or sanding direction you created. That’s what makes blotching so maddening to us woodworkers. It doesn’t follow logic. It follows the wood’s cellular structure, where soft earlywood drinks stain fast and hard latewood resists it. No amount of sanding fixes that underlying reality.
Sanding problems look like this
Visible streaks. Swirl marks. Directional patterns that only show up after stain goes on. The wood looked perfectly fine before staining. The marks follow wherever you sanded. This is a surface texture problem, not a wood problem. You either skipped grits, ran dull sandpaper, or changed direction between sanding stages. Different issue entirely.
How to tell which one you have right now
Look at the uneven area in bright, raking light — hold your phone flashlight at an extreme angle to the surface so light hits it from the side. Then run your fingernail lightly across the problem spot. Don’t press down. Just let the nail rest on the wood and drag it slowly.
Feel scratches or ridges? Sanding problem. Surface feels smooth but the color is just uneven? Blotching.
This test takes thirty seconds and saves you from sanding more when blotching is the real issue. Don’t make my mistake of sanding for an extra hour before realizing the problem was never the surface.
How to Fix Uneven Stain Absorption Before It Dries
If the stain is still wet, you have options. Not many, but real ones. Act fast.
For sanding problems — the streaky kind — grab a clean lint-free cloth and wipe the stain off immediately while it’s still tacky. You’ll pull the most stain out if you work within the first five to eight minutes. Then sand with 180-grit, clean off all dust, and reapply. Don’t oversand. You’re breaking the scratches, not resurfacing the entire board.
For blotching on soft woods, you’re already in trouble if the stain has been sitting more than ten minutes. The end grain and soft earlywood have already started pulling darker — that’s done. Best move: wipe it off and accept you need a different approach. Apply a super-thin coat of pre-stain conditioner or 1-pound cut shellac right now, let it dry fully, then stain over it. The conditioner seals the wood just enough to even out absorption rates without killing the color entirely.
If it’s been longer than fifteen minutes, or you’re not confident stripping it back, stop. Let it dry. Sanding wet stain clogs your paper fast, muddies the wood grain, and will almost certainly make things worse. Better to strip back to bare wood and start clean than to chase an uneven finish with increasingly desperate fixes — I’ve been down that road, and it ends with a piece of pine that looks like a tie-dye experiment.
Fixing It on the Next Board — Prep Steps That Actually Work
The correct sanding sequence is non-negotiable. Start at 80-grit. Move to 120. Then 150. End at 180. Do not skip grits — skipping from 80 to 150 leaves micro-scratches the 150 simply can’t erase. Each grit removes the scratches from the previous one only if you follow the sequence.
Use fresh sandpaper. Worn paper clogs fast and doesn’t cut evenly — you’ll feel it dragging. A 50-sheet box of 120-grit Mirka sanding discs runs about $18 and lasts through a dozen boards. Worth every dollar.
Sand with the grain, especially in the final grits. Not in circles on a flat surface — ever. Circular sanding creates swirl patterns that stay invisible until stain hits the wood, then they’re all you can see. Straight, overlapping passes only.
After reaching 180-grit and dusting off completely, apply pre-stain wood conditioner if you’re working with blotch-prone species. Minwax Pre-Stain Wood Conditioner is the standard — apply it wet, let it soak for about five minutes, wipe off the excess, then wait at least thirty minutes before staining. Overnight is honestly safer.
Here’s the timing detail that most instructions gloss right over: if you apply stain too soon after wiping the conditioner, while it’s still damp, the conditioner re-dissolves and blotching returns. Wait until the wood feels completely dry to the touch. I’m apparently impatient about this, and Minwax conditioner works for me while rushing it never does.
Gel stain might be the best option for blotch-prone woods, as pine and cherry staining requires even penetration control. That is because gel stain is thicker and soaks in more slowly than liquid stain — it simply can’t dive into soft earlywood as aggressively. Minwax Gel Stain costs a bit more ($8 versus $5 for liquid on a quart), but on pine or cherry, the improved finish is worth it.
Stop sanding at 180-grit. Do not go to 220 or higher if you plan to stain. Over-sanding past 180 closes the pores so completely that stain won’t penetrate — and you’ll get a blotchy, pale finish anyway. More sanding is not always more progress.
When the Wood Species Is the Real Problem
Pine, maple, cherry, and birch will never absorb stain as uniformly as walnut or oak. That’s not a prep failure. That’s cellular structure. End grain in pine is three to four times softer than the latewood surrounding it. No prep process fully closes that gap.
But what is the actual solution when the wood itself is working against you? In essence, it’s changing your approach rather than fighting the material. But it’s much more than that — it’s choosing the right tool for the specific problem in front of you.
If you need a truly uniform finish on blotch-prone wood, two realistic paths exist:
One: Use a dye stain first. Dye penetrates more uniformly than pigmented stain because the molecules are smaller — they slip into all the pores, not just the soft ones. Mix a water-soluble dye powder (about $8 for a pack from Woodcraft) to a light tone, apply it, let it dry, then apply your topcoat stain over it. The dye provides base color. The stain adds depth. Takes longer. Works well.
Two: Accept the blotching as character. Cherry and pine aren’t walnut. They never will be. A mottled finish is honest — it shows the wood’s actual structure rather than hiding it. Plenty of fine furniture carries uneven stain, and people love it precisely because it looks handmade, not factory-pressed. That’s what makes wood finishing endearing to us woodworkers. The material has opinions of its own.
Set your expectations before you open the can. If you’re staining soft woods and want factory perfection, you’re fighting wood. Work with what you have instead.


Stay in the loop
Get the latest wood working workshop updates delivered to your inbox.