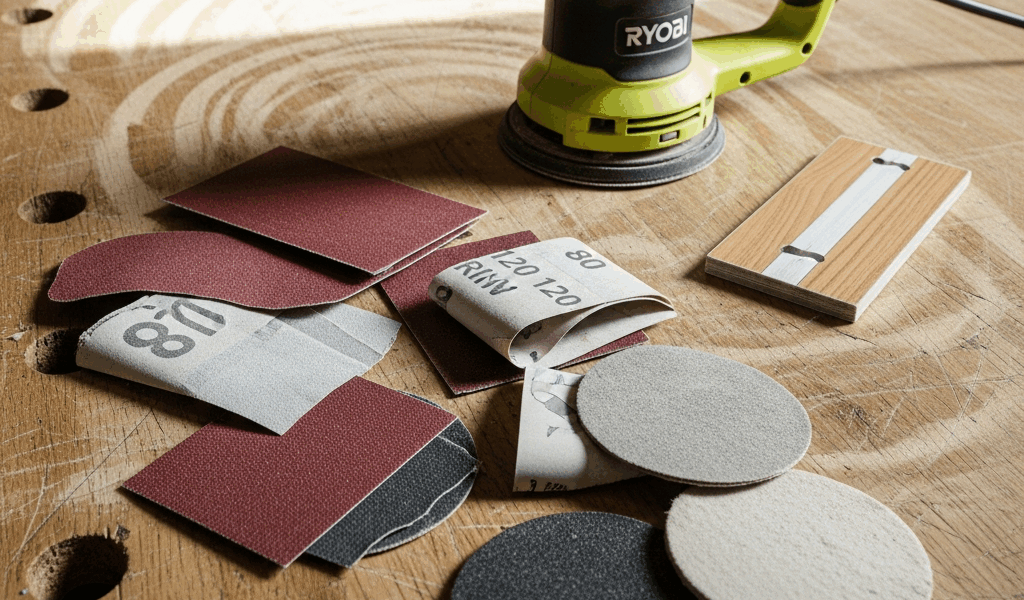
Why Your Orbital Sander Is Creating Swirl Marks
Orbital sander leaving swirl marks is hands-down the most frustrating finish problem I encounter in my workshop. I spent three years blaming cheap sanders before I realized the problem was me—not the equipment. Those concentric circles and curved scratches aren’t equipment failure. They’re almost always user-side, and that’s actually good news because you can fix them immediately.
Here’s what happens: orbital sanders work by moving abrasive paper in a randomized pattern, theoretically leaving no detectable scratch direction. When swirls appear, something in your setup or technique broke that random pattern. The abrasive is now following a predictable path instead of genuinely random motion. Probably should have opened with this section, honestly, because understanding the root cause saves you hours of rewatching YouTube videos.
The phenomenon is so common that three out of five woodworkers I know have abandoned finishing work entirely because they assumed their sander was defective. It wasn’t. Once you diagnose which of these five causes applies to your specific situation, you can apply the fix mid-project without starting over.
Cause 1: You’re Skipping Grit Steps or Jumping Too Coarse
Grit progression exists for one reason: each step removes the scratches left by the previous grit. When you skip steps, you leave deeper scratches that higher grits simply cannot remove. Think of it like this — 80-grit leaves visible scratches. If you jump straight to 150-grit, you’re asking 150-grit paper to do the work of both 120-grit and 150-grit. It can’t.
The standard progression for fine furniture work is 60→80→120→150→180→220. Some woodworkers stop at 180 for stained pieces, but that last jump to 220 eliminates the micro-scratches that catch light during finishing. I learned this the hard way after staining a walnut tabletop and watching swirls appear under the poly.
Your diagnostic is simple: if swirls appear after your final 150-grit pass, you skipped 120-grit. If they appear after 120, you jumped from 80 to 120. The quick fix is to backtrack one grit, re-sand the affected area for 2–3 minutes per square foot, then proceed with the next grit in the sequence.
One cost-saving mistake I made: I tried to skip 150-grit altogether on cabinet sides, thinking “no one will see it.” That assumption cost me a full re-sand with 120-grit after the stain went on and revealed swirls under side lighting. Don’t make my mistake.
Cause 2: Your Sanding Pad Is Worn or Clogged
A worn sanding pad creates swirls because the cushioning underneath the abrasive has flattened. The paper no longer floats; it locks into place, turning your random-orbital sander into a near-circular pattern machine. A clogged pad—packed with sawdust—has the same effect because the dust layer prevents the paper from maintaining consistent contact.
Your diagnostic is tactile. Press your palm firmly on the pad (sander off). It should feel slightly tacky and have a subtle give, almost like a gym shoe sole. If it feels perfectly smooth or so fluffy that your palm sinks into sawdust, the pad is shot. Replace it.
Replacement pads cost $8–15 for decent-quality hook-and-loop options. A 5-inch pad for my DeWalt orbital sander (model DWE6423K) runs about $12 per pad. Most packs of five cost $50, which is stupid cheap compared to the time you’ll waste sanding with a bad pad. I usually keep three fresh pads on rotation during finishing season.
Clogging happens faster with softer woods like pine or poplar. During a recent bench build, I cleaned my pad every 30 minutes using a stiff brush. That preventive five-minute step eliminated swirls entirely on the final grits. If you’re sanding and the sander feels like it’s losing bite, stop and brush the pad before assuming you need a new one.
Cause 3: Applying Too Much Downward Pressure
Here’s the counterintuitive part: more pressure doesn’t mean better results. Excessive downward force causes the sander’s pad to flex unevenly, which disrupts the random-orbital motion and creates localized swirl patterns. You’re essentially forcing the pad to follow the contours of minor wood irregularities rather than letting the randomized motion work.
The correct technique is what I call the “feather touch.” The sander should glide across the surface with no weight from your hands except the machine’s own mass. Your job is guiding the sander; gravity and the motor are doing the sanding. If you’re leaning on it, you’re doing it wrong.
Corded sanders (which weigh more) can handle slightly more pressure than cordless models, but “slightly” means a quarter-pound of additional force, not your full body weight. Even then, most finishing work requires basically zero pressure beyond the machine itself. A five-pound orbital sander needs five pounds of downward force—nothing more.
The mistake I made repeatedly: I assumed light pressure meant slower results, so I’d gradually increase pressure as the project timeline tightened. Then swirls appeared. Once I committed to feather-light pressure on final grits (180 and above), swirls vanished. That final coat of 220-grit? Barely any audible sound, just a whisper of abrasion.
Cause 4: Wrong Speed or Circular Motion Patterns
Most orbital sanders should run at 12,000 RPM or higher for finishing work. Check your manual, but that’s the industry standard for 5-inch random-orbitals. If you own a variable-speed sander, you might have accidentally dialed the RPM down for a previous project and forgot to reset it. Slower speeds, paradoxically, create worse swirl patterns because the randomization doesn’t randomize; it becomes circular.
There’s also the manual motion trap. Some experienced woodworkers manually move their sander in figure-8 patterns on final grits, thinking it improves results. It doesn’t—it creates swirls if your hand motion isn’t perfectly consistent. The sander’s random-orbital pattern already covers every vector. Adding your hand motion just fights against it.
Your fix: check your manual for the recommended RPM, set it to maximum (or whatever the manual specifies), and let the machine’s own randomized motion do the work. Don’t guide it in patterns. Just guide it across the surface in general passes without pushing in any specific direction.
Your Pre-Sand Checklist to Avoid Swirls Next Time
Before you touch the sander to wood, confirm these five points:
- Replace the pad if it’s been used for more than 3–4 hours of active sanding or looks visibly matted
- Clean the pad of all debris using a stiff brush or compressed air
- Confirm your grit sequence matches the standard progression (60→80→120→150→180→220) with no skipped steps
- Set RPM to maximum or per your manual specification
- Use only feather-light pressure—the sander’s weight plus an extra quarter-pound at most
I laminate this checklist and reference it before every finishing project. It takes 90 seconds and prevents hours of rework. After you’ve diagnosed and fixed swirls once, the pattern becomes obvious. You’ll start catching yourself mid-technique before problems develop.
The most common setup in my shop right now is a Makita BO4556K (5-inch random-orbital) with a fresh Mirka pad, running at 12,000 RPM, progressing through grits with no skips, and applied with basically no pressure. That combination produces finishes so smooth you can read by them. Swirls? Gone.


Stay in the loop
Get the latest wood working workshop updates delivered to your inbox.